- Print Business Cards in Sugar Land – Same Day Service
- Copying Services
- Document Printing, Finishing & Lamination in Sugar Land
- Flyers
- Print Shop in Sugar Land Banners & Posters Printing
- Graphic Design
- Photo Printing
- Postcard Printing
- Document Printing
- EDDM Full Service Postcards
- FotoZoomer Large Format Printing

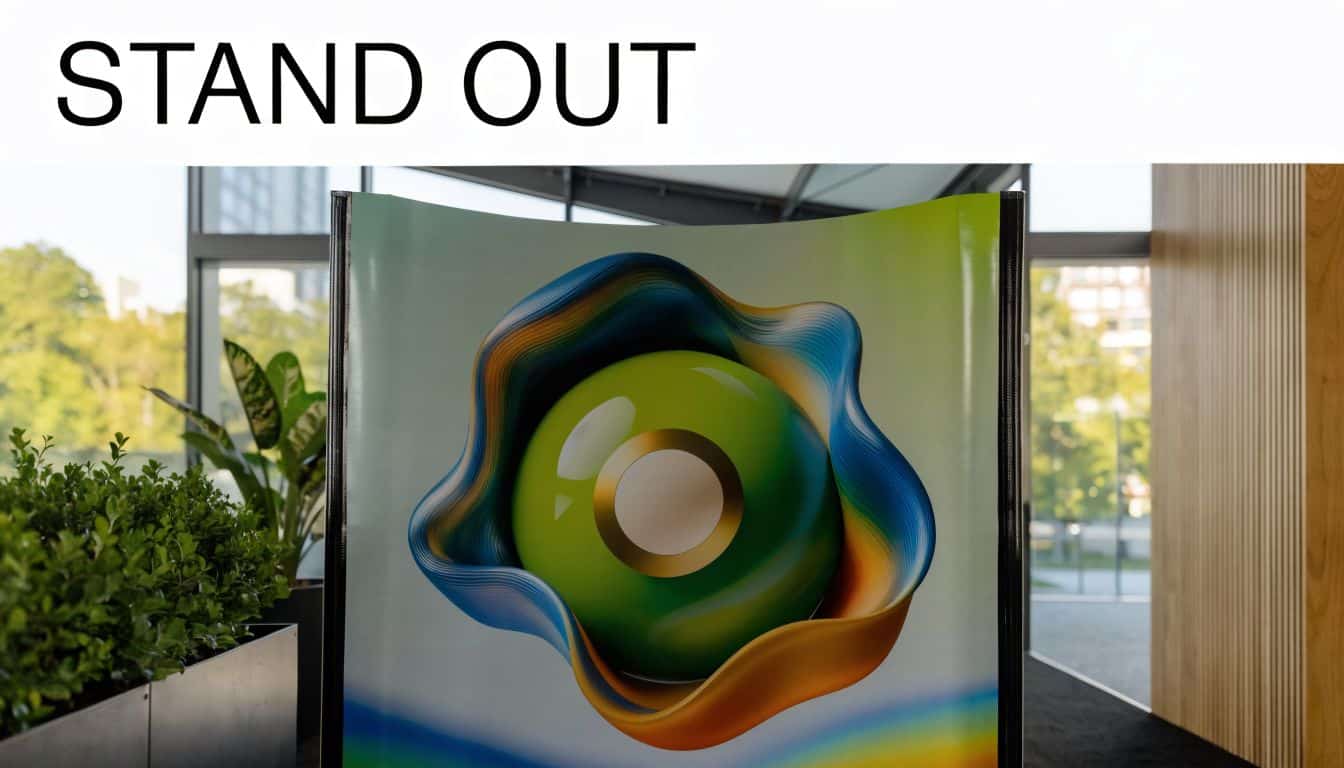
You’ve got an event coming up in Sugar Land. The booth is booked, the tablecloth is packed, and then it hits you. Your display still doesn’t say who you are in a way people can spot from across the room.
That’s usually when people start searching for roll up banner printing and realize there are more ways to get it wrong than they expected. A banner can look polished and pull people in, or it can curl at the edges, hide the most important text in the base, and make a good business look unprepared.
For a first banner project, the goal isn’t just to get something printed fast. The goal is to get it printed right the first time, especially if you need same-day turnaround and don’t have time for a reprint.
Table of Contents
- Your Essential Guide to Roll Up Banners
- Choosing the Right Banner Size and Material
- Preparing Your Artwork for Flawless Printing
- Design Tips for Banners That Actually Get Noticed
- Understanding Hardware Options and Print Finishes
- Pricing Turnaround and Easy Installation
- How to Order Your Banner at Business Mail Boutique
Your Essential Guide to Roll Up Banners
A roll up banner solves a very specific problem. You need a sign that looks professional, travels easily, sets up fast, and doesn’t require tools, extra hands, or a full display budget.
That’s why small businesses keep using them for job fairs, pop-up markets, chamber events, school functions, lobby displays, and retail promotions. The format is simple. A printed graphic retracts into a base, a support pole holds it upright, and the whole unit packs into a carry case when you’re done.
One reason this format has stayed relevant is that printed signage still matters in person. The global printed signage market was valued at approximately $40 to $41 billion in 2023, and banners and backdrops held 33.87% of that market, which shows how heavily businesses still rely on physical displays for events and retail environments, as noted in UPrinting’s signage market overview.
What a roll up banner actually includes
A good retractable banner system usually has three parts:
- The printed panel that carries your message, logo, offer, or brand image.
- The retractable base that stores the graphic and gives the display weight and stability.
- The carry case that protects the stand during transport and storage.
What makes this setup useful is the balance between visibility and convenience. You can carry one into a building with one hand, set it beside a table or entry point, and create instant branded presence without turning setup into a project.
Practical rule: If your event setup window is short, a roll up banner is often the safest display choice because it asks so little from the user on site.
A lot of first-time buyers think of banners as decoration. That’s the wrong frame. A banner is better used as a silent salesperson. It tells people who you are before you say a word, and it gives your booth, counter, or lobby a clear visual anchor.
Choosing the Right Banner Size and Material
A banner can be beautifully designed and still disappoint if the size is wrong for the space or the material fights the hardware. Most rookie mistakes happen here. People choose based on price alone, then wonder why the banner looks flimsy, too small, or slightly translucent under bright lighting.
Size choices that fit real business uses
The most common retractable size is the standard 33 x 80 inch format, which is widely used and sits in the sweet spot between portability and visibility. It works for most indoor business events because it’s tall enough to be noticed and narrow enough to fit tight booth footprints.
Here’s a simple way to think through common sizes and uses:
| Size (Width x Height) | Common Name | Best For |
|---|---|---|
| 33 x 80 in | Standard retractable | Trade shows, lobbies, sales tables, clinic waiting areas |
| Wide format | Wide retractable | Step-and-repeat style visuals, product launches, photo areas |
| Compact format | Mini or narrow retractable | Retail corners, reception desks, tight indoor spaces |
If you’re still comparing options, it helps to browse a real banner category with common display formats before finalizing your artwork.
Material choices that change how the banner looks
Material is where a lot of bargain banners give themselves away. The graphic may print fine, but after a little time in the stand, edges start curling, light shows through the panel, or the surface won’t stay flat.
Industry-standard 13 to 15 oz. PET blockout poly film is a strong choice because it offers 99%+ opacity and is recommended for a curl-free appearance that keeps the banner looking professional even after repeated use, according to US Press retractable banner material guidance.
That matters in real rooms. Overhead lighting, glossy floors, and nearby windows can expose every weakness in a cheap material.
What works and what usually doesn’t
- PET blockout film is the safer pick when you want the panel to stay flatter, look more polished, and resist show-through.
- Basic vinyl can work for short-term use, but it’s more likely to show edge memory or surface waviness.
- Fabric graphics can look refined in some display systems, but they aren’t always the first choice for a standard retractable setup where consistent tension matters.
Don’t choose material by how it looks in a tiny website thumbnail. Choose it by how it behaves after transport, setup, takedown, and storage.
If your banner will travel to multiple events, stand near bright indoor lighting, or sit next to cleaner premium displays, material quality shows up fast. For one-off use, you can accept more compromise. For repeat use, the banner surface is where better spending usually pays off.
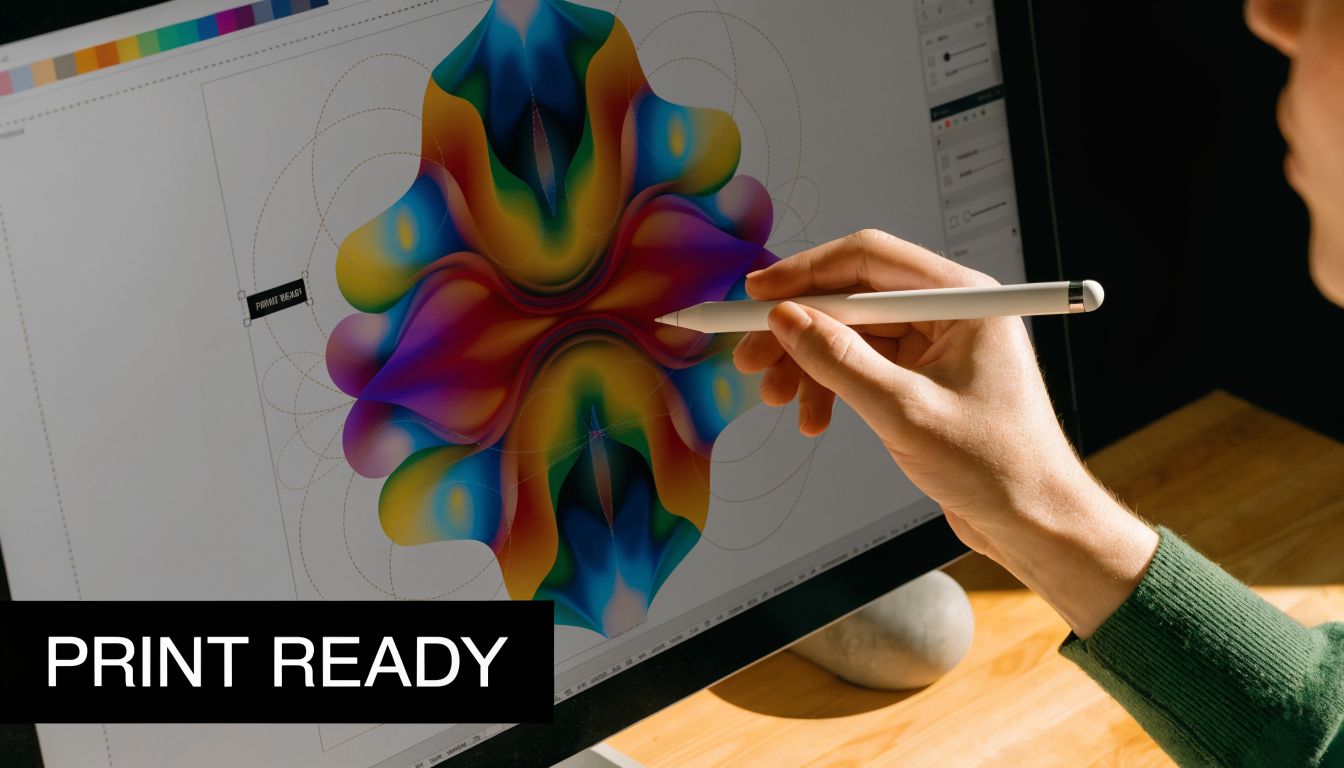
Preparing Your Artwork for Flawless Printing
The fastest way to waste same-day service is to send a file that isn’t ready. Most print delays don’t come from the printer. They come from artwork with missing bleed, low-resolution images, RGB color, or text placed where the hardware will cover it.
Start with the file setup, not the decoration
If you’re building the banner yourself, start by asking for the correct template or final dimensions before designing anything. That saves more time than fixing a finished file later.
For roll up banner printing, a print-ready file should be built for the actual banner size, with enough extra background around the edges to account for trimming and installation. It should also leave safe space at the bottom because part of the graphic sits inside the base when the banner is assembled.
A good prepress habit is to review a print-ready file checklist for customer artwork before you upload anything.
Three file mistakes that cause most banner problems
-
Using low-resolution images
A photo that looks decent on a phone screen can fall apart when enlarged to banner size. For sharp output, use high-resolution source images from the beginning. Don’t stretch a small logo or screenshot and hope the printer fixes it. -
Designing in RGB instead of CMYK
Screens display color with light. Printers use ink. If you design in RGB, some bright colors can shift when converted for print. Building the file in CMYK gives you a more realistic expectation of the printed result. -
Ignoring bleed and safe zones
Background colors and images should extend past the trim area so you don’t get unwanted white edges. Important text should stay away from the very bottom and edges so it doesn’t get trimmed off or hidden by the hardware.
A clean file doesn’t just print better. It speeds approval, reduces back-and-forth, and makes same-day service more realistic.
A quick visual walkthrough helps
If this is your first banner, watching a short setup on file prep can save frustration before you submit artwork.
When in doubt, export a press-quality PDF with fonts outlined, images embedded, and the full document set to final size. If you’re using Canva, Adobe Illustrator, Photoshop, or another layout tool, the principle is the same. Build for print, not for social media.
Design Tips for Banners That Actually Get Noticed
Most weak banners have the same problem. They try to say everything. A banner isn’t a brochure, menu, website, and sales script all at once. It’s a glance-level display.
That’s why less is more wins in banner design. A clear headline, one supporting idea, and one action you want the viewer to take will usually outperform a crowded layout with paragraphs, tiny bullet points, and multiple competing messages.
Less copy gets more attention
A major design issue many businesses overlook is legibility from a distance. Technical print guides often explain file setup but skip the practical question of whether people can read the banner across a room, which is highlighted in this video discussion on banner design gaps.
That missing piece matters more than most design flourishes. If someone has to walk up close to understand your banner, the banner isn’t doing enough work.
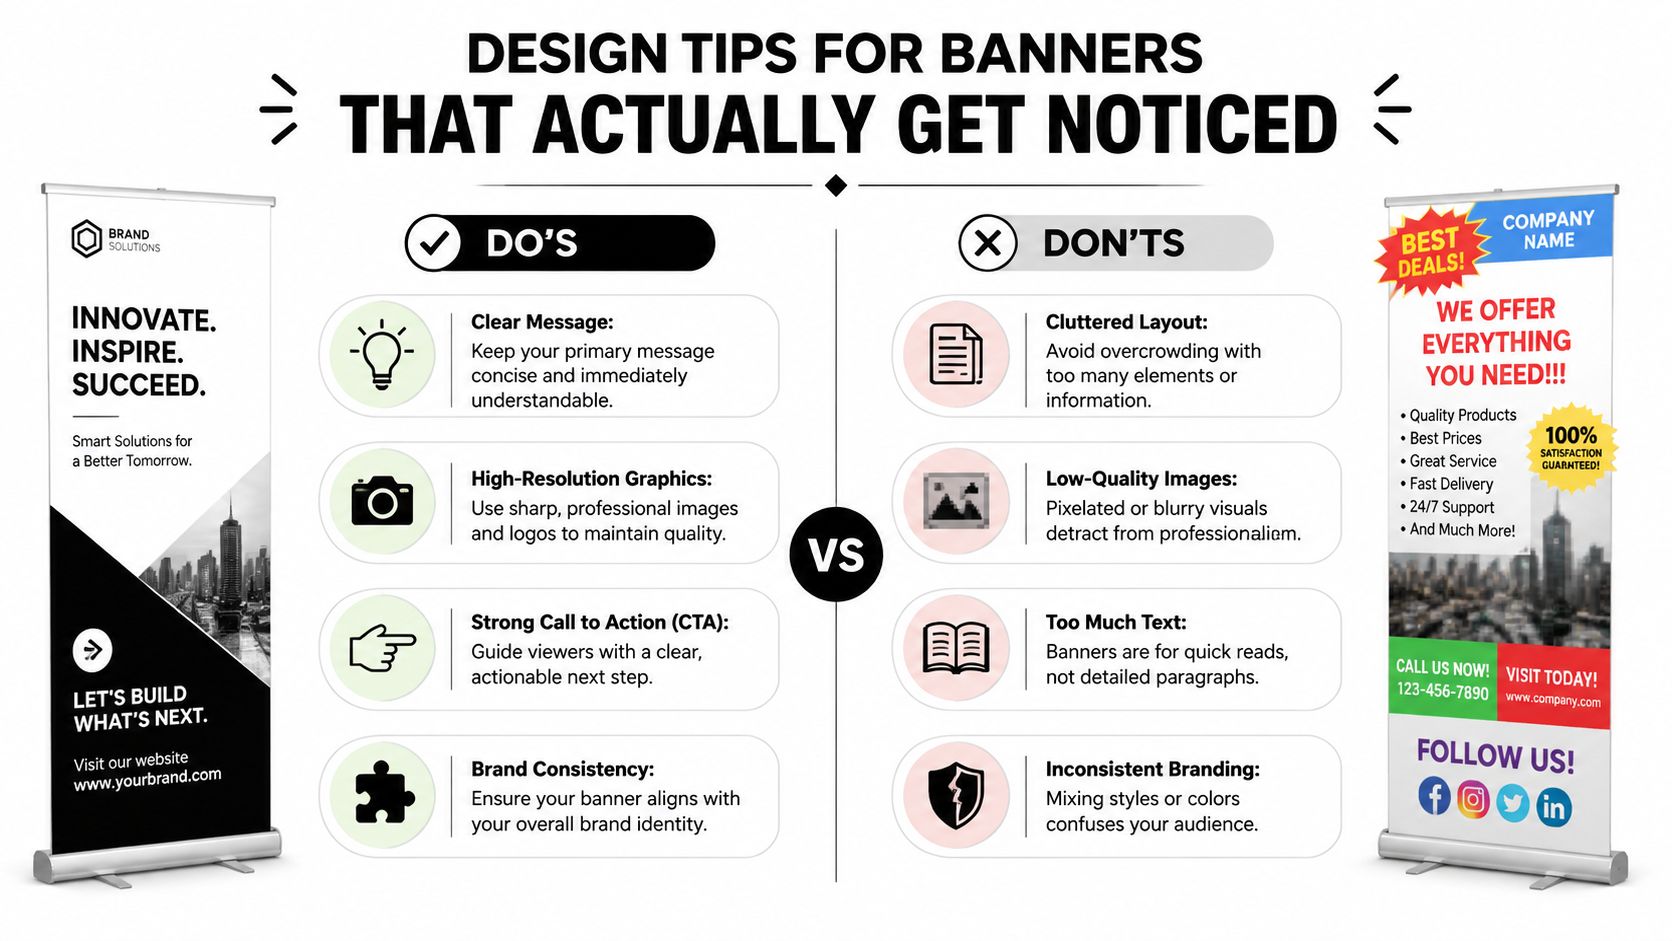
Use this filter before you approve a design:
- Headline first. Can someone understand your core offer in a quick glance?
- Logo visible. Is your branding easy to identify without dominating the whole layout?
- One action. Are you asking for one next step, such as visit, call, scan, or ask?
- Minimal text. Does every line earn its place?
Build a visual path for the eye
People don’t read banners top to bottom like a page. They scan. Good banners guide that scan.
A practical layout often works like this:
| Banner area | What belongs there |
|---|---|
| Top | Logo or business name |
| Middle | Main message or visual |
| Lower middle | Supporting phrase or benefit |
| Bottom | Call to action, contact point, or QR code |
“If the banner needs explanation before it makes sense, simplify it.”
Color contrast matters too. Dark text on a light background is usually easier to read quickly than low-contrast combinations. Fancy fonts often look stylish on a laptop and frustrating at event distance. Stick with clean typefaces and strong spacing.
A banner should support the conversation, not compete with it.
Understanding Hardware Options and Print Finishes
Two banners can use the same artwork and produce very different impressions because of the stand underneath. Hardware affects stability, ease of setup, how straight the graphic sits, and how confident you feel using it in public.
Economy hardware versus premium hardware
Economy bases can be fine for occasional indoor use. They keep cost down and work when the banner won’t be moved often. But they usually show their limits sooner. The base may feel lighter, the pole fit may be less precise, and the graphic tension may not look as smooth over time.
Premium hardware generally feels sturdier in the hand and steadier on the floor. It’s a better fit for businesses that plan to use the same display repeatedly at networking events, presentations, expos, or rotating in-store promotions.
Here’s the practical trade-off:
| Option | Best fit | Common trade-off |
|---|---|---|
| Economy stand | One-time or occasional use | Less refined feel, less stability |
| Standard stand | General small business use | Balanced performance and cost |
| Premium stand | Frequent travel and repeated setup | Higher upfront price |
Double-sided hardware can also make sense in open floor plans, hallways, or event areas where people approach from both directions. It’s not always necessary, but when visibility from all sides matters, it can solve a real problem.
When finish matters more than people think
Print finish changes how the banner behaves under lighting. A matte finish is often better in brightly lit interiors because it cuts glare and keeps text easier to read. A gloss finish can make colors appear more vibrant, but glare can work against you if the banner sits under direct lights or near windows.
If the banner is text-heavy, matte is usually the safer call. If it relies on bold product photography and controlled indoor lighting, gloss can work well.
Hardware is the part people don’t think about until setup day. Then it becomes the part they care about most.
The right stand and finish don’t just improve appearance. They reduce little frustrations that make a display feel cheap.
Pricing Turnaround and Easy Installation
The price of a retractable banner usually lands in a practical middle ground for small businesses. According to Mod Displays’ pricing guide for retractable banners, these stands typically cost between $99 and $400, depending on size, material, and hardware quality. The same source also notes that setup time is typically under one minute.
What changes the price
The main price drivers are straightforward:
- Size affects both print area and stand hardware.
- Material changes how polished and durable the banner feels.
- Base quality influences stability and lifespan.
- Single-sided or double-sided format changes the system you need.
The cheapest option isn’t always the least expensive in practice. If the banner curls, looks dim, or needs replacement after limited use, the savings disappear quickly.
Why same-day matters locally
Local events rarely move on a generous timeline. Someone notices the old banner looks dated. A sponsor changes. A phone number needs fixing. A sales rep suddenly needs a display for tomorrow morning.
That’s when local service matters more than abstract online savings. If you’re comparing turnaround, look at whether the printer can realistically review files, flag setup problems early, and still produce the banner in time. For nearby businesses, same-day posters and banners in Sugar Land can be the difference between showing up prepared and improvising with a foam board from the office.
Setup is simple if you do it correctly
Setup is easy, but there is a correct way to do it:
- Place the base on a flat surface so the stand starts stable.
- Assemble the support pole fully before lifting the graphic.
- Pull the banner upward with control instead of snapping it fast.
- Hook the top rail carefully so the graphic stays aligned.
- Retract slowly after use to avoid stressing the panel.
A roll up banner is one of the few display tools that a busy owner, employee, or volunteer can handle without much instruction. That convenience is a major part of its value.
How to Order Your Banner at Business Mail Boutique
Ordering goes smoothly when you treat it like a short production job, not a casual upload. The more clearly you communicate the basics, the less likely you are to hit approval delays or avoidable mistakes.
What to send before printing starts
Have these details ready:
- Your final file in a print-ready format if you already have artwork.
- The banner size you want so the file can be checked against the correct layout.
- Your deadline especially if the banner is needed the same day.
- Any placement notes for logos, QR codes, contact information, or sponsor marks.
If you don’t have a finished file, send the working pieces instead. A logo, brand colors, headline, website, and a short description of where the banner will be used is enough to start a useful conversation.
How the order goes more smoothly
Be direct about where the banner will stand. A trade show booth, church lobby, physician office, school event, and retail sidewalk entrance all call for different design decisions. The banner doesn’t live in a vacuum. Its job depends on the room.
For handling and setup, portability is a real advantage. Standard roller banner systems commonly weigh 3 to 6 kg, pack into a carry case, and use a setup method where you angle the banner pull to hook it onto the pole. That approach is associated with a failure rate of less than 1% over 100 cycles, based on roller banner assembly guidance and dimensions.
Bring urgency up front. “I need this by 3 p.m.” is much more useful than mentioning the deadline after the proof is approved.
If you’re local, picking up your banner instead of waiting on shipping also removes one of the biggest sources of last-minute stress. You can see the finished display, check the hardware, and walk out ready for the event.
If you need roll up banner printing in Sugar Land and want help getting the file, size, and hardware right the first time, Business Mail Boutique LLC is a practical local option. They offer same-day banner printing along with other business print services, so you can handle a last-minute event without waiting on shipping or guessing whether your artwork is ready.
Related posts

Business Card Printing Template Free: A Same-Day Guide
Click here to create your business cards
You realize you need business cards today. Maybe you’ve got a networking lunch in Sugar Land,...