
- Print Business Cards in Sugar Land – Same Day Service
- Copying Services
- Document Printing, Finishing & Lamination in Sugar Land
- Flyers
- Print Banner in Sugar Land | Same-Day Banner Printing Near Me
- Graphic Design
- Photo Printing
- Postcard Printing
- Document Printing
- EDDM Full Service Postcards
- FotoZoomer Large Format Printing


Electrical Panel Label Engraving.
Electrical panel label engraving explained step by step — codes, materials, methods, file prep, and how to order engraved panel labels that last.
Businessmailboutique
11645 S. Hwy 6
Sugar land, Texas 77498 United States (US)
Email: info@businessmailboutique.com
Route
A contractor opens a panel during a Monday inspection and finds a printed circuit label lifting at the corner. Breaker 14 still has a description, but part of the adhesive has curled away, the text is difficult to read, and nobody is certain whether the directory matches the latest one-line diagram. That small label problem can become a safety, maintenance, and inspection problem at the same time.
Electrical panel label engraving solves only part of that risk. The material may be permanent, but the information still has to be correct, legible, properly placed, and traceable to the contractor’s approved panel schedule. The strongest workflow treats fabrication as the final step in a data process, not as a substitute for one.
Table of Contents
- Why Engraved Panel Labels Exist in the First Place
- Codes and Standards Every Label Has to Meet
- Choosing the Right Material and Engraving Method
- Sizing, Placement, and Legibility Rules
- Preparing Your Files the Right Way
- Bulk Production and Data Integrity Workflows
- Ordering Locally, Installation, and Long-Term Care
Why Engraved Panel Labels Exist in the First Place
A panel label earns its place when the enclosure is opened repeatedly, cleaned, exposed to heat or moisture, or installed where sunlight and industrial conditions attack ordinary print. A paper directory can be replaced, but a small identification plate attached to the dead front or enclosure has to remain readable while electricians troubleshoot, isolate circuits, and compare field conditions with project records.
The industry moved toward permanent identifiers because circuit information is operational data. It tells the next person what a breaker supplies, which panel is fed from which source, and how equipment relates to the electrical design. Specifications commonly require durable, legible, permanently attached markings, with engraved phenolic nameplates described as three-ply material with a contrasting core and sharp, uniform engraving. Other electrical equipment documents allow engraved two-layer laminated plastic plates or thermal-transfer labels for circuit numbering, as described in this equipment labeling specification.
What fails in the field
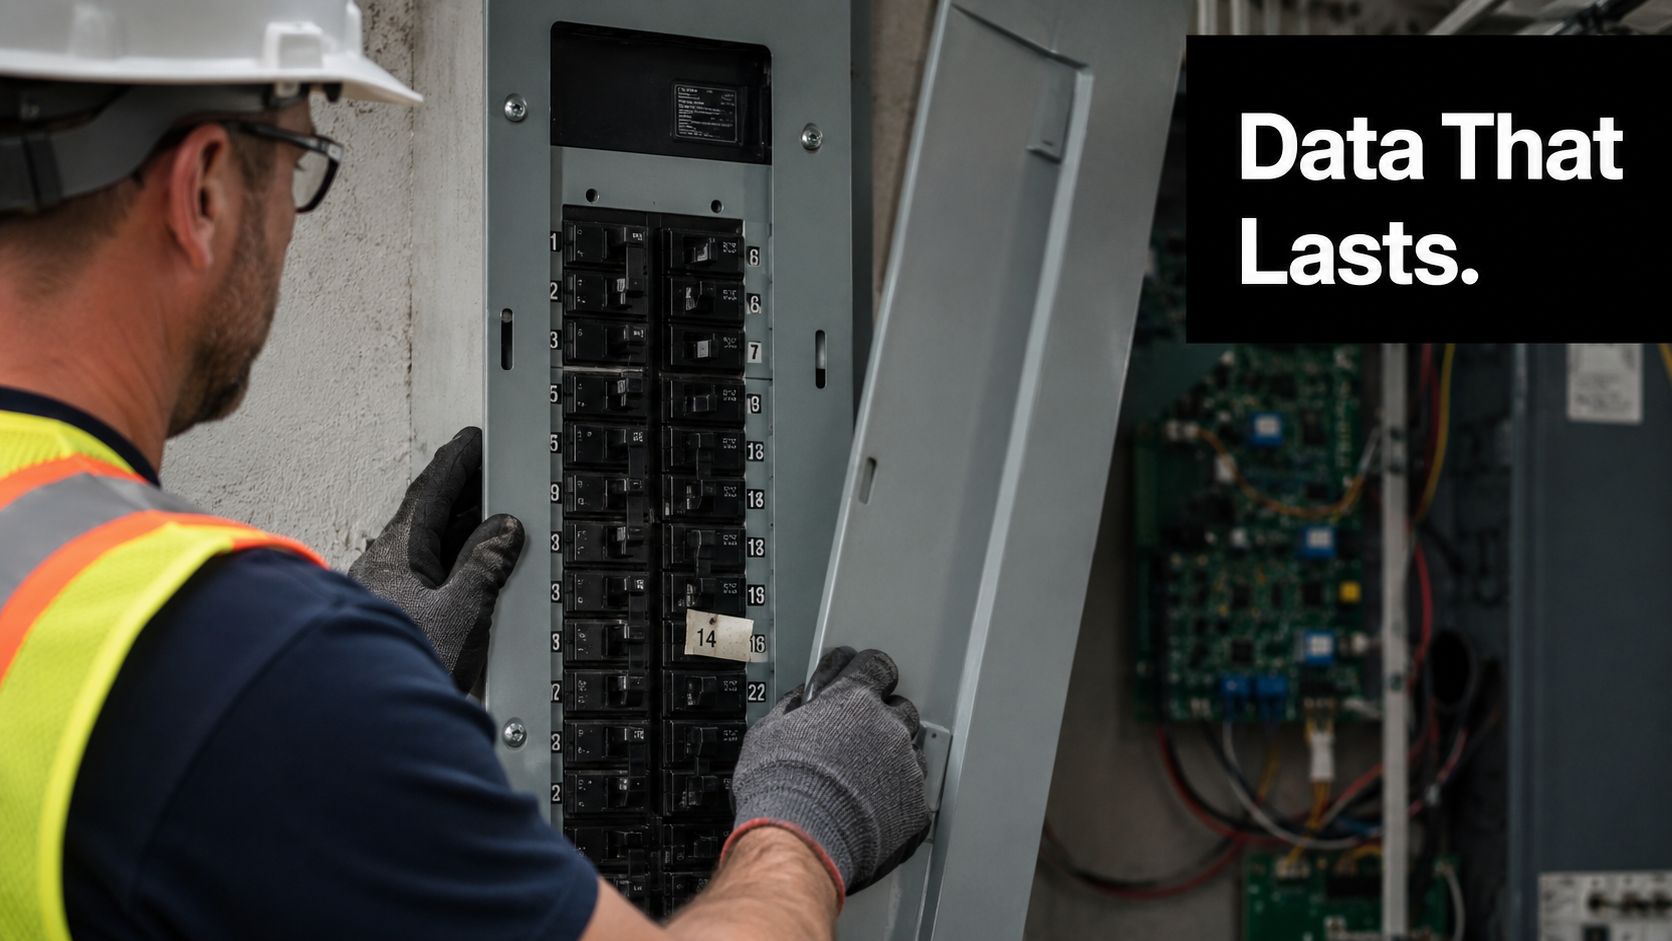
Printed adhesive labels can work in a clean indoor room, but they become a weak choice when the panel faces solvents, UV exposure, condensation, heat, abrasion, or frequent access. The failure usually starts at an edge. Once the adhesive lifts, dirt gets underneath, the label catches on gloves, and the printed film can separate from the backing.
A Sharpie may seem adequate for a temporary mark, but it doesn’t provide consistent character size, alignment, contrast, or permanence. Vinyl stickers create a cleaner appearance, yet they still depend on an adhesive and a surface bond that may not suit the enclosure or environment. Inspectors and facility owners often reject those shortcuts when the project specification calls for permanent identification.
Shop-floor rule: If the label has to survive the equipment’s service life, don’t make the identification depend on ink sitting on top of a disposable film.
Permanence doesn’t correct bad information
Engraving makes the physical marking durable. It doesn’t make a wrong circuit description right. A perfectly machined plate that says the wrong load is still a failure, which is why panel schedules, breaker numbering, revisions, and proof approval matter as much as the substrate.
Contemporary building and facilities documents commonly specify contrasting engraved laminates, mechanical fastening, and material thickness suited to sign size. Safety rules such as NEC 408.4 and NEC 110.21(b) reinforce the practical expectation that circuit directories and field-applied markings remain legible and durable. The useful standard is simple: identify the circuit purpose clearly, attach the label securely, and preserve the information for the life of the equipment.
Codes and Standards Every Label Has to Meet
The code question isn’t “Can I stick a label on this panel?” It’s “Will the required identification remain clear, durable, and available to the person working on the equipment?” NEC 408.4 addresses circuit directory identification, while NEC 110.21(b) addresses the durability and permanence of field-applied markings. The project specification may add exact requirements for size, material, contrast, attachment, and wording.
A contractor should separate fixed equipment identification from hazard marking before sending a file to the shop. The panel name, voltage, source, feeder designation, and breaker information are static or relatively stable identifiers. Arc-flash, shock, warning, and danger labels communicate hazards and may follow a different specification, color convention, or placement rule.
A field-ready inspection check
For a large service panel, an inspector is likely to care about practical results:
- Confirm circuit coverage. Each circuit and available directory position should correspond to the approved schedule.
- Check the wording. The label should describe the circuit purpose clearly, without abbreviations that only the installing crew understands.
- Test readability. Stand at the normal working position and verify that characters remain clear without removing unrelated equipment.
- Inspect contrast. Dark text on a light background, or an approved warning color combination, should remain distinct in the actual room lighting.
- Verify attachment. The plate shouldn’t lift, rotate, snag gloves, or interfere with the dead front.
- Separate hazards from identifiers. Don’t use a general circuit plate as a substitute for required hazard communication.
One panel-labelling standard calls for labels to remain legible from about 45 degrees and uses combinations such as white on red for warnings and black on white for other designations. A line-item electrical identification standard also defines content order and color-coded legends by voltage class. These details matter because a label can look acceptable straight on yet disappear when a technician reads it from the side.
For international projects, the terminology and local requirements may differ. An Australian switchboard labelling guide can help contractors compare local expectations with the requirements written into their own specification. Project documents always control, so don’t import a switchgear rule into a panelboard job without checking its scope.
| Reference | What It Covers | Practical Rule |
|---|---|---|
| NEC 408.4 | Circuit directory and circuit identification | Match each circuit with a clear, durable description |
| NEC 110.21(b) | Field-applied marking durability | Use marking methods that remain legible and permanently attached |
| ANSI Z535.4 | Product safety sign conventions | Keep signal words, colors, and hazard presentation consistent |
| Project specification | Material, size, contrast, and mounting | Follow the written requirement when it is more specific |
For additional context on how engraved plastic signs are used in construction documentation, review this new construction requirement for posting engraved plastic signs. The practical lesson is that compliance is rarely determined by engraving alone. It depends on whether the finished label delivers the exact information, durability, and visibility the project requires.
Choosing the Right Material and Engraving Method
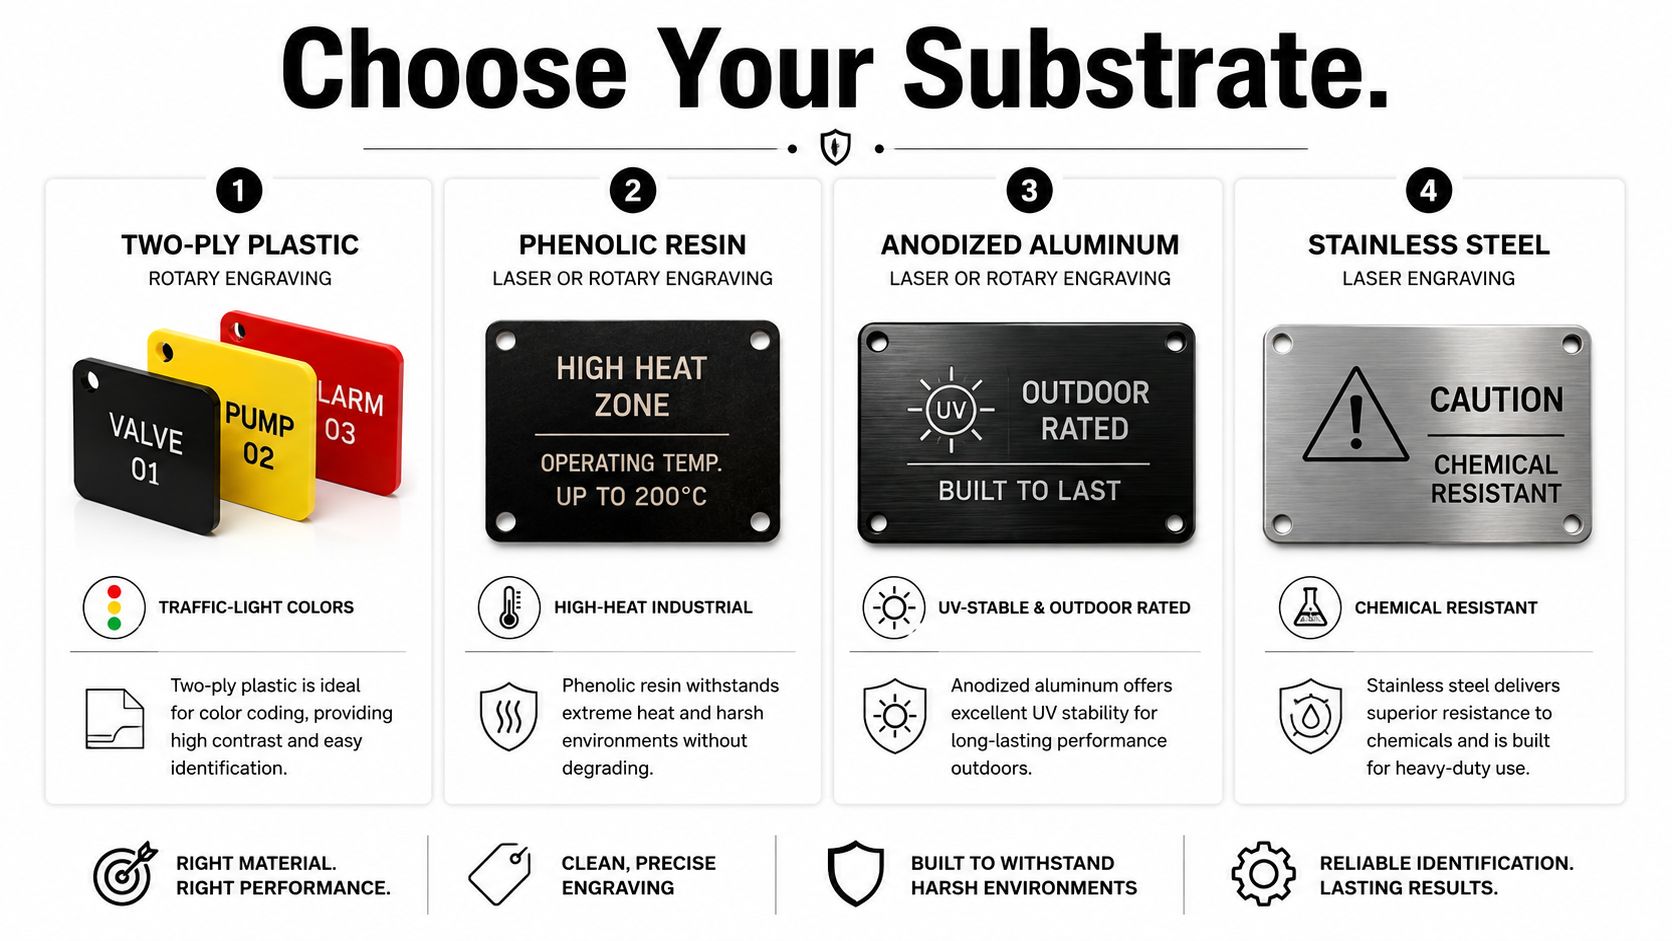
Material selection starts with the environment, not the color chart. A label inside a clean indoor enclosure doesn’t need the same resistance as one exposed to sunlight, washdown chemicals, or corrosive process vapors. The four materials below cover most panel and equipment identification work.
Two-ply plastic
Two-ply laminated plastic is the practical default for many indoor panels. A rotary cutter removes the face layer and exposes the contrasting core, creating strong color separation without relying on surface ink. Traffic-light colors are useful for familiar identification schemes, while black-on-white remains a dependable choice for ordinary circuit designations.
Rotary engraving works well because the cutter creates a physical channel in the material. This option is lightweight, easy to drill, and usually sensible for NEMA 1 interiors and protected equipment rooms. It isn’t my first choice for direct sun, aggressive chemicals, or repeated washdown.
Phenolic resin
Phenolic laminate is a tougher industrial option where heat and handling demand more from the plate. It can be rotary engraved, and some production environments use laser processes suited to the specific material and extraction setup. The result is a rigid, high-contrast plate that fits switchgear, industrial panels, and equipment with demanding specifications.
Do not choose phenolic just because the panel is expensive. Choose it when the specification or environment justifies the material, and confirm the engraving method with the shop before production.
Anodized aluminum
Anodized aluminum gives outdoor equipment a light, clean, UV-stable identification surface. A fiber laser can mark the anodized layer with fine detail, making it useful for enclosure IDs, asset plates, and exposed equipment where a plastic face may weather or look out of place.
For a NEMA 3R installation, anodized aluminum is often a sensible middle ground. It offers a metal finish without the weight and cost of stainless, but the mounting method and finish still need to match the enclosure.
Stainless steel
304 stainless suits many indoor and mildly harsh industrial settings. 316 stainless is the stronger choice where corrosion, marine exposure, or chemical contact is a serious concern. Shops may use laser etching or rotary engraving, depending on the required finish, depth, and fill.
Stainless costs more and takes more care to cut, deburr, and mount. For a washdown NEMA 4X environment, however, under-specifying the plate can create a false economy. Adhesive selection, edge finishing, and fastener compatibility matter as much as the steel grade.
This engraved vinyl sheet resource is useful when the job calls for a thin, flexible sheet solution rather than a rigid engraved plate. It shouldn’t be treated as interchangeable with phenolic, aluminum, or stainless without checking the enclosure conditions.
The best shop recommendation is usually the least complicated material that meets the environment and specification. Don’t under-spec a corrosive installation, and don’t over-spec a clean residential panel just to make the plate feel premium.
Sizing, Placement, and Legibility Rules
A label can be permanent and still fail if nobody can read it from the working position. Character height should follow viewing distance, enclosure geometry, room lighting, and the angle at which an electrician will approach the panel. The commonly used relationship is roughly one two-hundredth of the viewing distance, with a 0.3-inch minimum associated with the 50-foot rule. Those figures should be checked against the governing specification rather than applied blindly.
Panel schedules often use characters around 3/16 to 1/4 inch, with circuit IDs somewhat smaller where the dead front has limited room. A label read from above, below, or the side needs enough height and contrast to remain useful. One panel-labelling standard specifically applies a 45-degree legibility expectation, so a design that works only when viewed straight on is a poor design.
Common sizes and placements
| Label Type | Character Height | Typical Label Size | Placement |
|---|---|---|---|
| Main panel identification | 1/4 inch or larger | Wide plate sized for name and source | Above breakers or on the door |
| Circuit schedule heading | 3/16 to 1/4 inch | Directory strip or header plate | Above the circuit rows |
| Circuit identification | Slightly smaller than the heading | Narrow individual plate or strip | Beside the breaker or in the directory |
| Hazard designation | 1/4 inch or larger where required | Size set by the hazard specification | On the door or designated equipment face |
Place the information where the work happens
The dead front, directory pocket, and inner door each serve a different purpose. A panel name and voltage may belong above the breakers, while a circuit schedule belongs in the directory area. Hazard labels should remain visible without being hidden by an open door, wiring, or removable trim.
Keep clear of live parts and follow the equipment manufacturer’s installation instructions. A label that requires drilling or fastening near energized components creates an unnecessary risk. For sealed or rated enclosures, check whether drilling changes the enclosure rating before choosing mechanical attachment.
Contrast deserves the same attention as size. Black lettering on a white phenolic face often beats reverse text in a dim switchgear room, especially when glare, dust, and uneven lighting reduce the value of a glossy surface. Matte finishes, restrained spacing, and a clear reading order usually outperform decorative layouts.
Readability test: Hold the finished proof at the same angle and distance a technician will use in the room. If the breaker number disappears behind glare or tight spacing, change the layout before engraving.
Common failures are predictable. Text is too small because the designer optimized for fitting every word. The plate is mounted behind wire bundles. The label sits at an angle where overhead lights wash out the engraving. Fixing those problems in the file is cheap. Fixing them after installation means rework, access time, and a second approval cycle.
Preparing Your Files the Right Way
The engraver doesn’t need a beautiful screenshot. The shop needs geometry, text, dimensions, and a reliable relationship between each label and its circuit record. Vector files such as SVG, AI, DXF, and vector PDF preserve that information far better than a raster PNG.
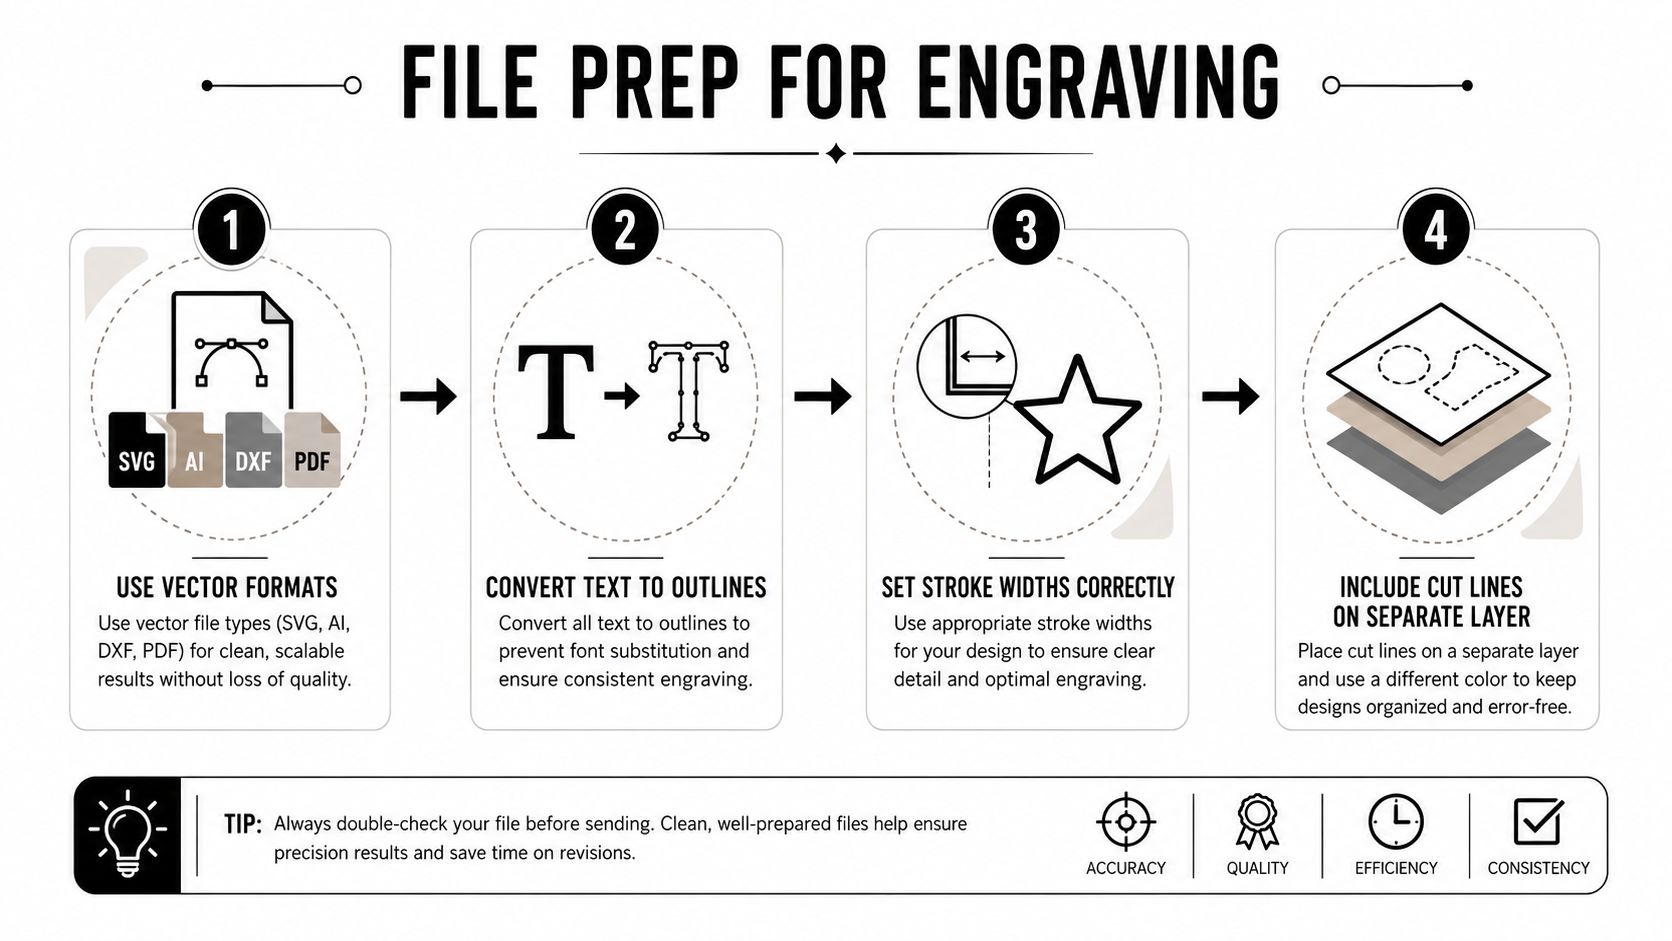
Convert text to outlines before export when the shop doesn’t need to edit the wording. That prevents font substitution from shifting a row, changing character widths, or disturbing alignment. If the shop must edit the file, include the font information and a locked reference proof, then ask for a final proof before production.
Build the file for the machine
Rotary and laser processes have different limits. A practical starting point is a minimum stroke width of 0.014 inch for rotary work and 0.008 inch for laser work, subject to the material, cutter, and shop process. Very small characters may need a larger size or a simpler font, particularly on dense circuit strips.
Keep cut lines, engraving paths, and drill holes on separate named layers. Dimension corner radii and hole locations in inches when that matches the shop’s production standard, and include a clear safe margin so text doesn’t crowd an edge or disappear into a countersink.
Three reliable export paths
- Excel schedule: Copy the approved schedule into the shop’s template, lock column widths, preserve breaker order, and include a separate column for material, label size, and mounting method.
- AutoCAD or EPLAN directory: Export the relevant layers with names that match breaker IDs. Include the panel reference and revision in the file name and drawing title.
- CSV bulk file: Use one row per label, with stable fields for panel, breaker, description, voltage, phase, size, material, and quantity. Keep the original source file unchanged.
A flattened PDF with editable-looking text is a common trap. The letters may be pixels, the embedded photograph may never engrave, and a missing bleed on an adhesive backer can leave the finished label undersized. A photo of an old nameplate is useful as a reference, but it isn’t a production drawing.
File handoff rule: Send the schedule, the geometry, and the visual proof as separate evidence. One file should not be expected to serve all three purposes.
Before approval, compare the proof against the panel schedule, not memory. Confirm breaker sequence, spelling, abbreviations, line breaks, hole locations, and any special symbols. A clean file reduces shop questions, but a signed proof is what authorizes production.
Bulk Production and Data Integrity Workflows
Panel labeling is a database problem before it becomes a fabrication problem. The shop can cut hundreds of plates accurately and still deliver the wrong result if the source schedule contains stale descriptions, duplicated breaker numbers, or a mismatch between the one-line diagram and the as-built panel.
Retyping a long list by hand creates unnecessary opportunities for transposed numbers, inconsistent abbreviations, and missed revisions. A single structured spreadsheet should drive the output, with fields for panel name, breaker number, circuit description, voltage, phase, label dimensions, material, finish, mounting method, and revision.
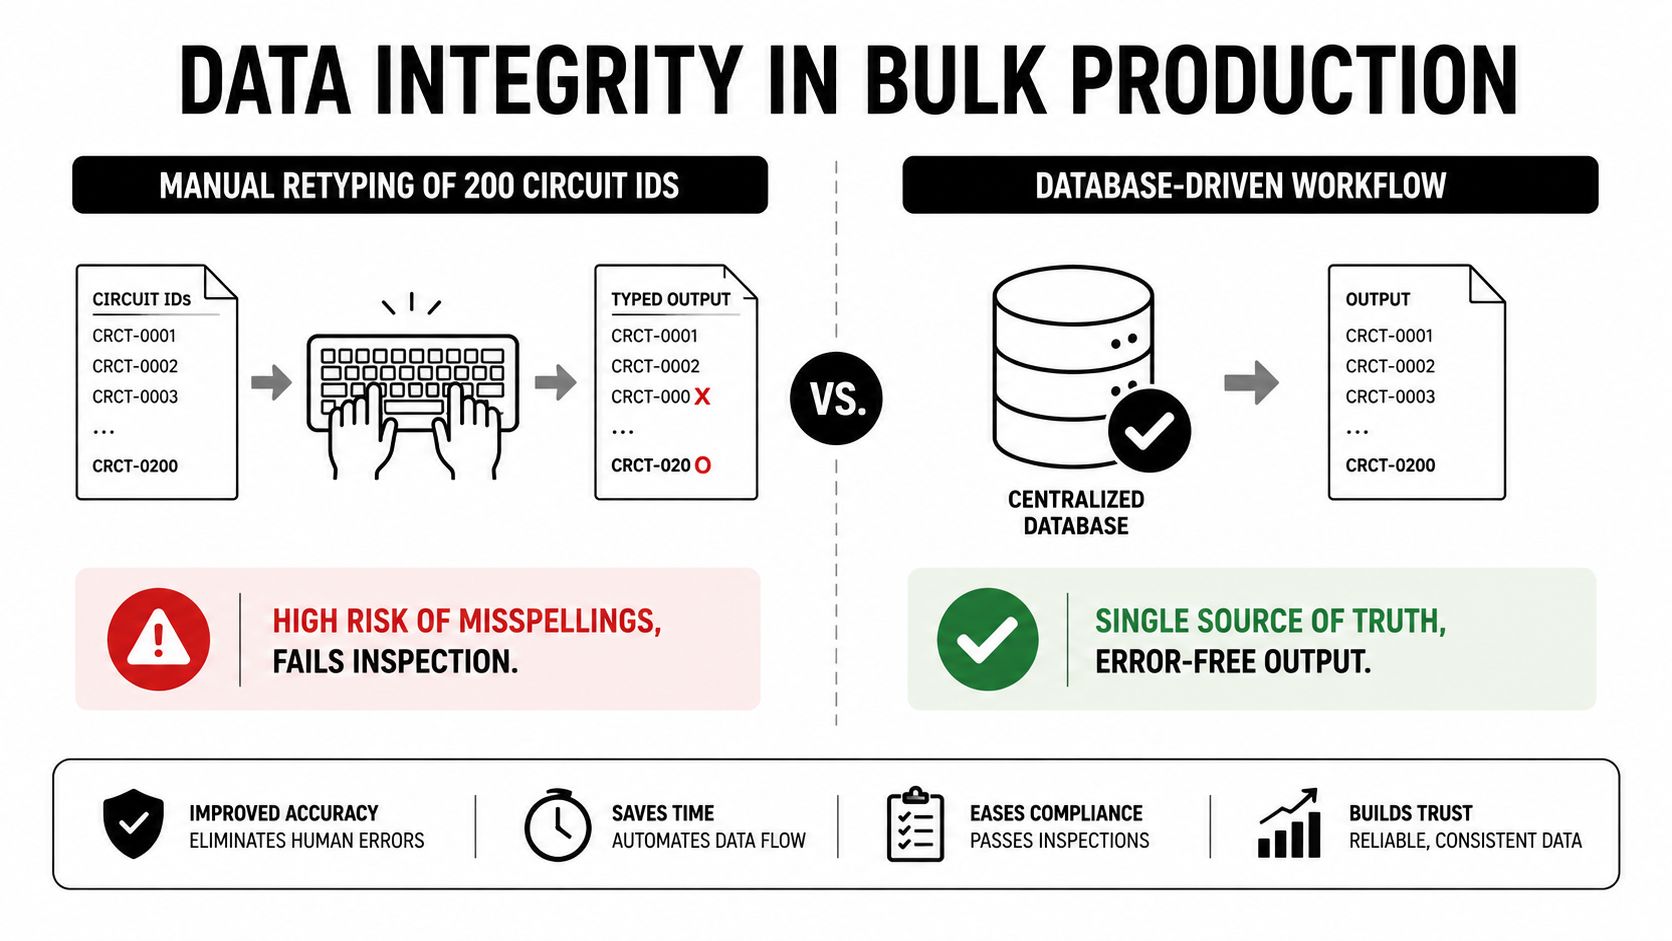
A proof-first production sequence
- Collect the authoritative source. Start with the approved panel schedule, then reconcile it against the latest one-line and field notes.
- Normalize the fields. Use one spelling for repeated equipment names and one convention for breaker and panel references.
- Import the data. Generate labels from the spreadsheet or CSV instead of retyping each plate.
- Export a proof PDF. Keep the panel order and breaker sequence visible so the contractor can review it quickly.
- Return marked corrections. Redlines should identify the exact panel, row, and requested change.
- Approve the final file. The shop engraves only after the contractor signs off on the proof.
- Archive the release. Store the source schedule, proof, revision, and final production file together.
A useful variation pairs the proof PDF with a matching numbering file or checksum record. The purpose isn’t technical theater. It gives the contractor a way to verify that the file reviewed is the file sent to production.
Why bulk import beats one-off orders
Manual entry may seem faster for a small batch, but it becomes unreliable as panels, revisions, and materials multiply. Bulk import reduces duplicated typing and lets the same source file generate a phenolic plate today, a replacement directory later, or an adhesive label for a retrofit without rekeying the circuit descriptions.
The wholesale and bulk engraving service is relevant when a contractor needs a repeatable production process rather than isolated custom plates. Whatever shop you use, ask how it handles revisions, proofs, duplicate breaker IDs, and retained source files.
Use version-controlled filenames such as panel name, drawing revision, and approval status. Don’t overwrite the previous schedule. When an AHJ asks why a label differs from an earlier drawing, the revision history should answer the question without relying on someone’s inbox or memory.
Ordering Locally, Installation, and Long-Term Care
A good order starts with a complete handoff. Before contacting an engraver, collect the approved panel schedules, circuit counts, breaker layout sketches, relevant one-line diagrams, and required hazard wording. If NFPA 70E language or an owner standard controls the warning text, send the exact wording instead of asking the shop to improvise it.
For production, provide a vector PDF, AI, or DXF for cut shapes and holes. A high-contrast raster image can help when the shop is reproducing a photographed nameplate, but it shouldn’t replace a dimensioned drawing for new work. Include the panel identifier, revision, material, finish, quantity, attachment method, and the required delivery sequence.
Installation decisions that hold up
Adhesive and mechanical fastening solve different problems. For a clean, properly prepared powder-coated or painted enclosure, 3M VHB 4941 is one option contractors specify for a strong adhesive bond. Surface preparation, temperature, pressure, cure time, and the enclosure finish still matter, so follow the adhesive manufacturer’s instructions.
Stainless screws or rivets make sense on stainless or aluminum doors when the specification permits holes and the enclosure rating remains protected. Don’t drill a NEMA 4X or similar enclosure casually. Confirm the manufacturer’s guidance and use an appropriate sealing method before creating a penetration.
Magnetic backers are convenient for temporary shop organization, but vibration and vertical mounting can make them unreliable as a permanent panel solution. A plate that slides or drops can cover the wrong breaker or disappear during maintenance.
Set a realistic production plan
Turnaround depends on quantity, proof changes, material, machining, and shipping. Shops commonly quote three to seven business days for orders under 200 labels, with phenolic work potentially taking longer, as stated in the supplied production brief. Pricing also varies by substrate, engraving area, holes, adhesive, and finishing. Request a line-item quote rather than budgeting from a generic per-label assumption.
A practical quote should identify:
- Material and thickness: Confirm whether the plate is two-ply plastic, phenolic, anodized aluminum, or stainless.
- Process: Ask whether the shop will use rotary engraving, fiber laser marking, or another method.
- Mounting: Specify adhesive backing, screws, rivets, or another approved attachment.
- Proof policy: Confirm that production waits for written approval.
- Packing order: Require labels to be grouped by panel and breaker sequence.
Maintenance is straightforward but shouldn’t be ignored. Clean with a method compatible with the substrate, avoid solvents that cloud or attack anodized finishes, and inspect edges for lifting. Recheck mechanical fasteners during scheduled maintenance, then audit panel labels against the current one-line diagram whenever circuits change. The label remains useful only while the underlying data remains current.
Business Mail Boutique LLC provides laser engraving and custom electrical box metal plates, along with printing and document services that can support a contractor’s file and production handoff. Visit Business Mail Boutique LLC to discuss engraved panel plates and related business printing needs in Sugar Land.

Related posts

Custom Memorial Glasses Engraved in Three Hours in Sugar Land
When a customer needed eight personalized glasses for a memorial, Business Mail Boutique completed the engraving or...

Custom Martini Glass Engraving in Sugar Land, TX
Custom Logo Engraving on Martini Glasses in Sugar Land, Texas.
Business Mail Boutique recently completed a beautiful custom engravin...

Custom Engraved Wine Glasses for a Golf Club Event in Sugar Land, TX
Custom Engraved Wine Glasses for a Golf Club Event in Sugar Land.
Custom wine glass engraving in Sugar Land, TX at Business Mail Bouti...