
- Print Business Cards in Sugar Land – Same Day Service
- Copying Services
- Document Printing, Finishing & Lamination in Sugar Land
- Flyers
- Print Banner in Sugar Land | Same-Day Banner Printing Near Me
- Graphic Design
- Photo Printing
- Postcard Printing
- Document Printing
- EDDM Full Service Postcards
- FotoZoomer Large Format Printing


International Passport Photos: Global Standards.
Ensure your international passport photos meet global standards. Our guide covers country-specific sizes & common rejection reasons to avoid.
Businessmailboutique
11645 S. Hwy 6
Sugar land, Texas 77498 United States (US)
Email: info@businessmailboutique.com
Route
You’ve got the trip booked, the visa checklist is nearly done, and then the photo counter says your passport picture won’t pass. That’s the frustrating part of international travel prep, the picture looks fine to you, but the application office may be checking something far more technical than a flattering headshot. A passport photo is really a biometric identity image, and the rules behind it are built for machine readability, not casual portrait standards.
For travelers and the people helping them, the safest approach is to treat international passport photos like a document specification, not a simple print order. Keep your travel paperwork organized early, because a rejected photo can stall everything else, and a practical system for manage your travel papers helps prevent that kind of scramble.
Why Your Passport Photo Is More Than Just a Headshot
A lot of applicants take the first photo, check it on a phone screen, and assume the task is finished. Then the application gets delayed because the image misses the destination’s formatting rules, or because it looks fine to the eye but fails the technical check.
The primary function of a passport photo
The image is not there only so an officer can identify you at a glance. Its job is to support identity systems that compare a face consistently across borders and travel documents. That is why modern passport-photo rules are tied to biometric travel-document standards, and why the framework behind them comes from ICAO Doc 9303 (technical framework and geometry).
Practical rule: if a feature makes facial comparison harder, it raises the risk of rejection. Shadows, odd angles, and background distractions all work against the image.
A photo can still fail even when it looks ordinary. A straightforward selfie may be rejected because the head is not centered correctly, the background is not uniform enough, or the file is not clean enough for automated screening. Those failures usually happen after a person has already spent time on the application, which makes them expensive to fix.
Why travelers get burned by simple assumptions
International trips make this harder because one photo rarely fits every destination. A single set of passport and visa standards does not exist, and required dimensions can change depending on where you are applying, as shown in the country-by-country photo requirement reference. That is where many avoidable delays start.
If you handle passport photos for families, employees, or clients, the mindset needs to shift. Ask, “Does it meet the exact document rule for this application?” not, “Does it look good?” That question saves time, reprints, and repeat submissions. It also helps people keep the rest of the trip paperwork in order when they manage your travel papers.
Understanding the Global Passport Photo Standard
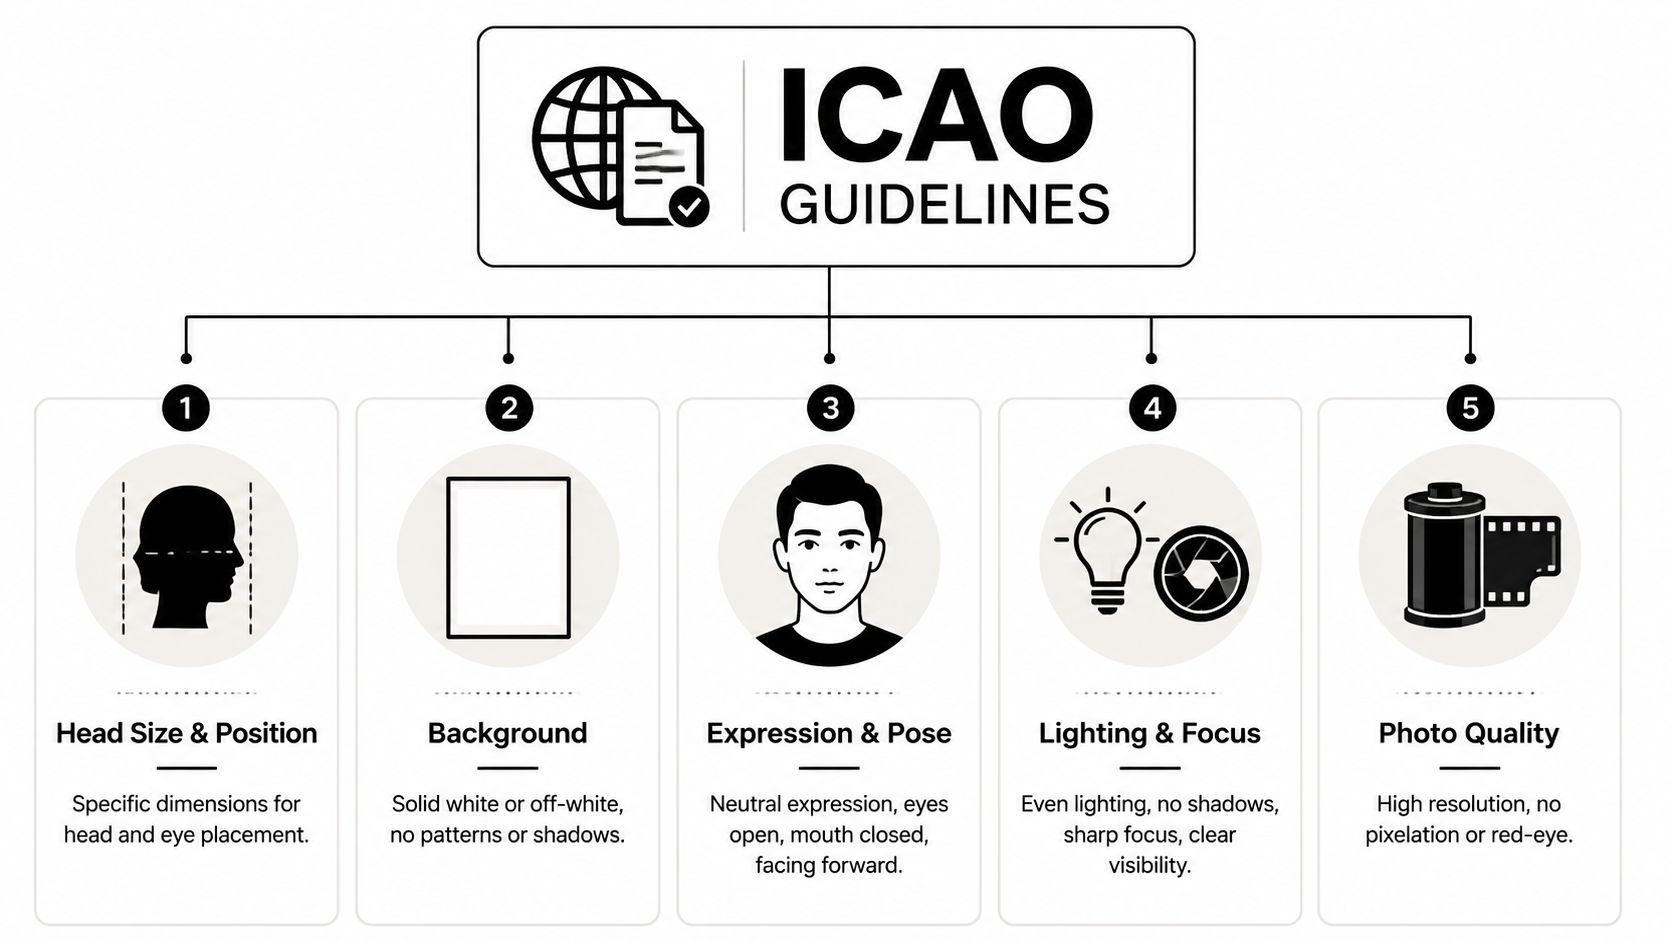
A passport photo has to do more than show your face. It has to give border systems a clean, predictable image that can be checked by machines and reviewed by people without ambiguity. That is why the global baseline starts with ICAO Doc 9303, which sets the pose, expression, background, and frame geometry used in machine-readable travel documents.
What ICAO is actually asking for
The core rules are straightforward. The person should face forward in a full-face frontal pose, keep a neutral expression, and stand against a plain light background. The face also needs to be framed so the head fills 70–80% of image height, with the eyes sitting 50–60% up from the bottom.
Those proportions are there for a reason. The photo has to support automated checks that compare facial position and structure, not just a human glance. If the face is too small, the system loses detail. If it is too large, the template can fail.
For print quality, ICAO recommends a minimum of 300 dpi. In practical terms, that means the print should hold detail cleanly, without the softness or dot pattern that often shows up in low-quality output.
Why the geometry matters in practice
The usual mistake is to focus only on “white background” and “no smile.” Those details matter, but they do not carry the full file. A photo can still be rejected if the head is tilted, cropped too tightly, or placed too low, even when the face itself is clear.
The safest passport photo is the one that looks slightly formal to a human and completely predictable to a machine.
That standard is useful across borders. The closer the photo stays to ICAO-style framing, the easier it is to adapt the same capture process to a destination-specific format later. A practical reference for that kind of workflow is Business Mail Boutique’s ID photo requirements page, which treats travel photos as a document format first and a print product second.
Key Differences in Major Country Requirements
The mistake I see most often is assuming one compliant passport photo works everywhere. It doesn’t. The global standard gives you the baseline, but each authority still narrows that baseline into its own size, framing, and submission rules.
A file that passes one office can fail another for reasons that are easy to miss. A square photo, for example, is acceptable for the U.S., but the same image usually will not fit a rectangular format without a proper crop. That is why the capture process has to start with the destination, not with a generic passport template.
Side-by-side differences you’ll actually run into
The U.S. uses a 2 × 2 inch square format, which is 51 × 51 mm (U.S. photo rules). For online submissions, the same guidance requires the digital file to fall between 600 × 600 and 1200 × 1200 pixels, so image size matters as much as the printed cut. The State Department also requires 1 color photo taken within the last 6 months, with the head measuring between 1 inch and 1 3/8 inches from chin to top of head (U.S. passport photo timing and head size).
Many ICAO-aligned international formats use 35 × 45 mm, including the UK, Schengen-style applications, Japan, India, Australia, Germany, and Ireland (comparative standard reference). China uses a different visa format at 33 × 48 mm (comparative standard reference).
| Country/Region | Photo Size (mm) | Photo Size (inches) | Head Size (Chin to Crown) |
|---|---|---|---|
| United States | 51 × 51 | 2 × 2 | 1 inch to 1 3/8 inches |
| UK and Schengen-style applications | 35 × 45 | 1.38 × 1.77 | 31 to 35 mm |
| China visa format | 33 × 48 | 1.30 × 1.89 | 26 to 30 mm |
Why one print can fail a second application
A photo can be technically clean and still be the wrong shape. A square U.S. image will not fit a rectangular format without resampling or a new crop, and the reverse problem shows up just as often. Travelers who need more than one application should check the exact destination before they print, because a file that looks fine on a screen can still miss the required framing once it is uploaded or trimmed.
The practical move is to treat the destination requirement as the starting point, not the finishing step. If the country or visa office specifies a different aspect ratio, use that exact format before you print or upload anything. That avoids the common digital failure mode where the image is sharp but the head position, crop, or overall proportions no longer match the submission system.
Common Reasons Your Photo Will Be Rejected
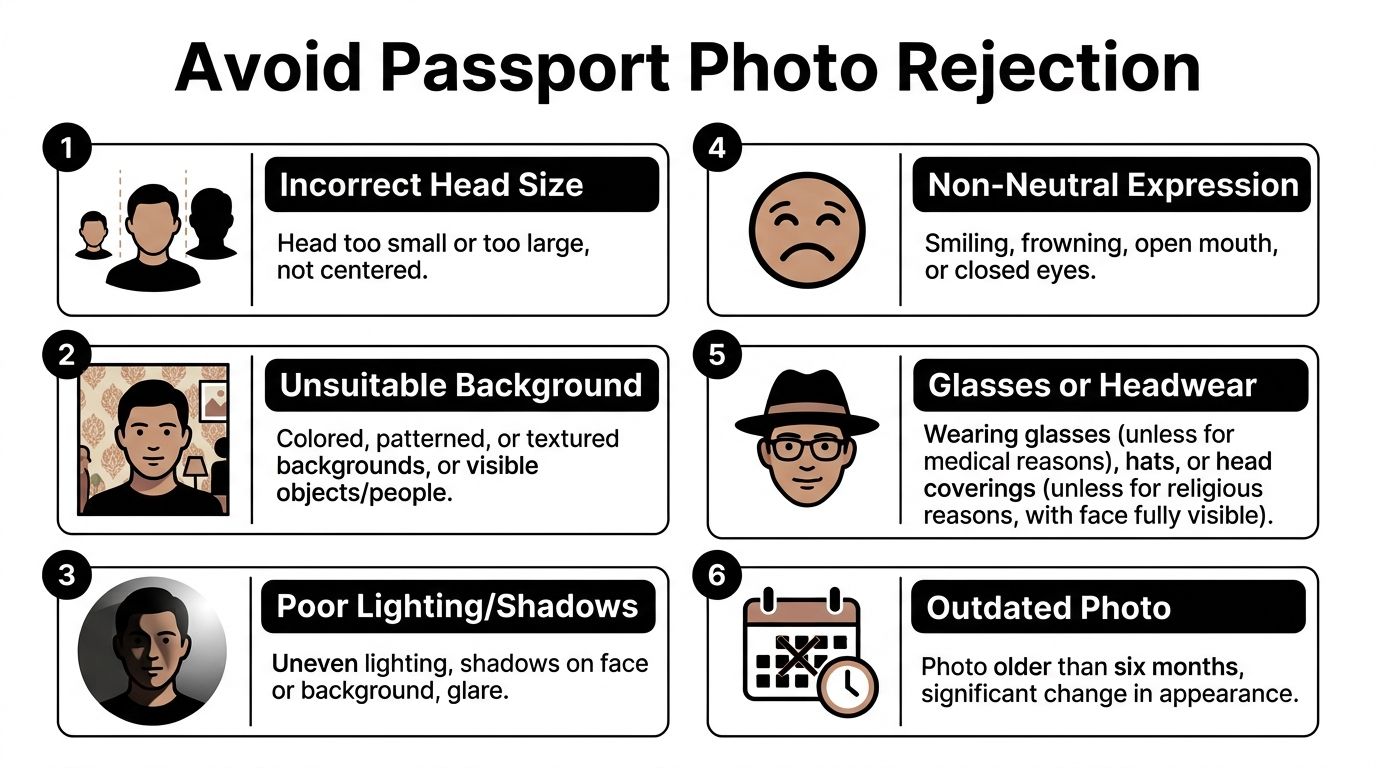
People often blame rejection on bad luck, but the cause is usually visible once you know what reviewers and automated systems are checking. The photo may be too dark, the background may carry a tint, the head may sit slightly off-center, or the file may look fine on screen and fail during screening.
The failures that catch careful applicants
A non-neutral expression can still cause trouble, especially if the mouth is open or the face reads as a smile. A plain light background can also fail if it has a subtle color cast or if shadows fall across it. The same problem shows up in the face itself, because uneven lighting can make the image look off even when the pose is correct.
Digital submissions create another layer of risk. A photo can look acceptable to a person and still fail machine checks if the background tint is slightly wrong or the lighting is uneven, which are among the common digital rejection causes covered in the common digital rejection causes.
Important point: if the image needs your eyes to forgive a flaw, the system may not forgive it.
Print and file problems are easy to miss
Low-quality prints cause their own trouble. Printed photos need enough resolution to stay sharp and avoid visible print artifacts, which is why print resolution guidance points applicants toward 300 dpi for printed output. On the digital side, the issue is not just whether the face is visible. File quality, lighting consistency, and background uniformity all affect whether a submission passes, especially when an automated checker is involved.
The most reliable self-check is straightforward. View the photo at full size, look at the edge of the face against the background, and check for shadows under the chin or along the wall. If anything looks slightly off, reshoot it instead of hoping the system overlooks it. If you want a cleaner reference for what controlled framing looks like, view our headshot gallery and compare how even light and simple backgrounds reduce avoidable errors.
A photo can also fail when the digital file is handled badly after it is taken. Cropping too tightly, resizing without keeping proportions, or exporting a file that softens the face can all trigger rejection even when the original picture was good. That is why a reliable workflow matters, including the right capture setup and the right processing step, such as the tools used by passport photo processors.
DIY Photos vs Professional Services
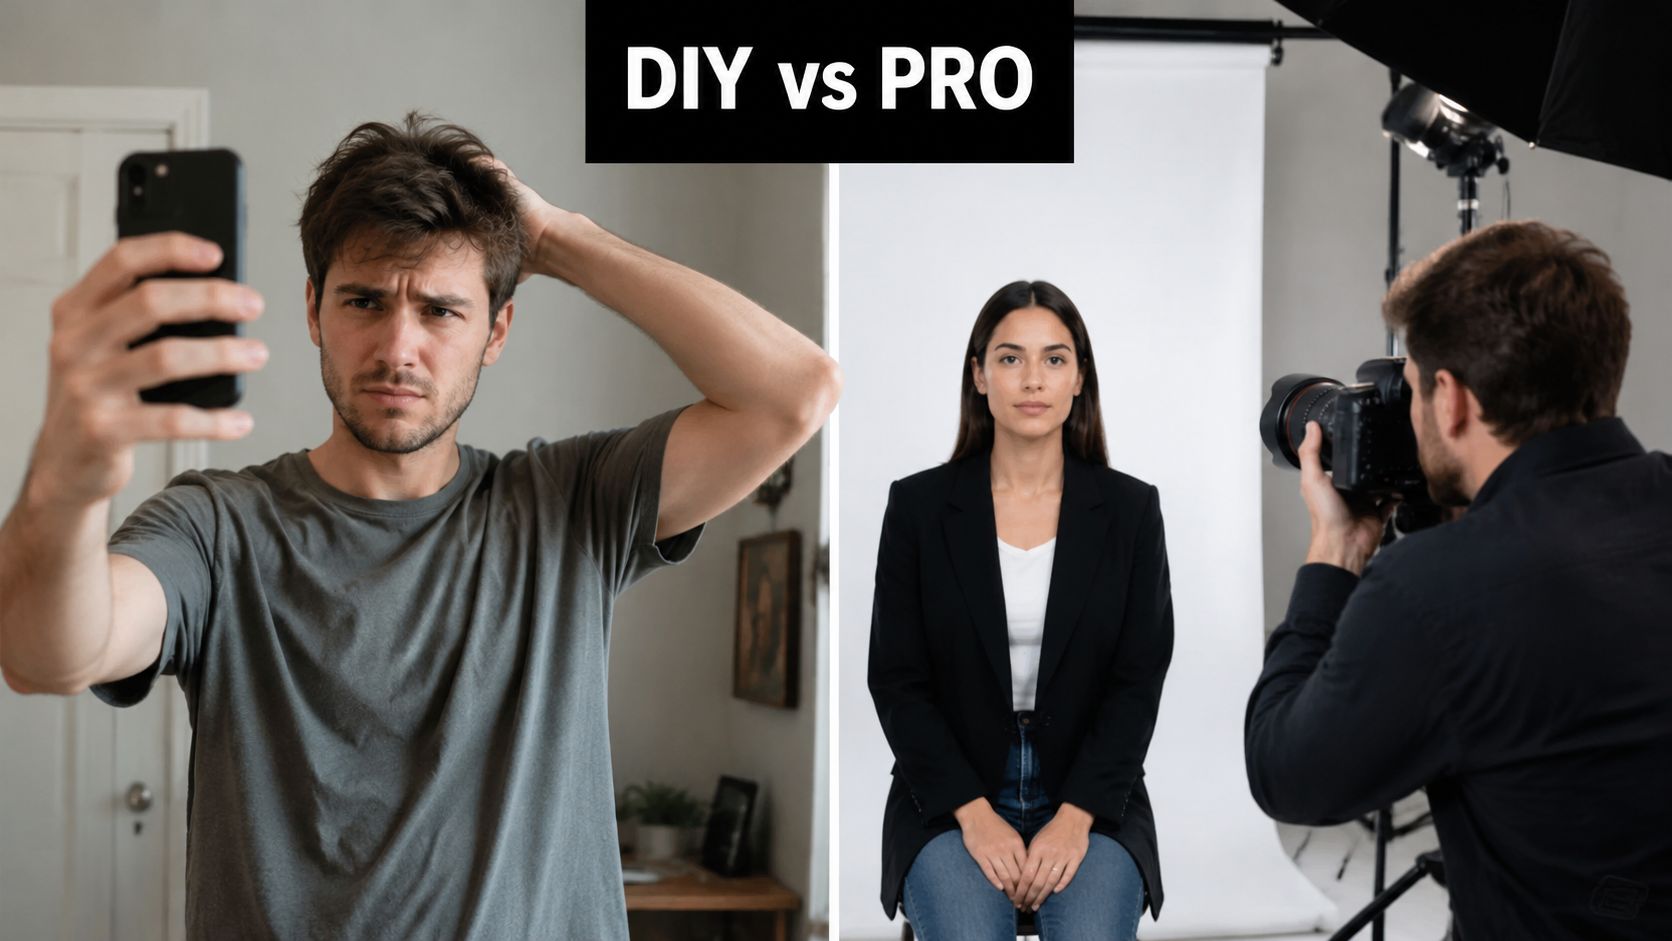
DIY photos look cheap up front, but they can become expensive when you count retakes, reprints, and delays. A professional service costs more than a phone snapshot, but it reduces the chances of getting trapped by lighting, cropping, or dimension mistakes.
Where DIY works and where it falls apart
DIY can work when you already know the exact format, have a plain wall, controlled lighting, and a way to crop accurately. It’s also useful when you need to test a photo before paying for prints. But it becomes risky fast if the room light is uneven, the wall color is wrong, or the camera angle introduces a subtle tilt.
The challenge is that the photo has to serve two masters, a human reviewer and an automated checker. A selfie may look centered to you, but the system may see a head size drift or a background issue. That’s why many applicants who try DIY end up doing multiple takes.
For a practical workflow reference, view our headshot gallery and notice how controlled lighting and clean framing remove guesswork from the final image.
What professional services change
A professional setup solves the hardest parts first. Lighting is even, the background is controlled, and the image is framed for the required dimensions before it ever gets printed or exported. The better the capture process, the less you have to fix after the fact.
If you’re comparing tools and workflows, the passport-photo processor page at Business Mail Boutique’s processor resource is a useful example of how service providers think about compliant output. The main benefit isn’t glamour, it’s consistency.
For travelers who need both printed photos and properly sized digital files, professional handling is often the safer choice. It cuts down on guesswork, and it’s especially helpful when the destination’s format differs from the standard U.S. square.
Get Compliant Photos Today at Business Mail Boutique
If you’re in Sugar Land and need a passport or visa photo that follows the right format the first time, a local walk-in service is the simplest path. Business Mail Boutique offers passport pictures at its Sugar Land location, and it also lists passport and visa processing among its services, which makes it a practical stop for travel paperwork needs.
What the service path looks like
Bring your documentation needs, get the photo taken, and leave with the format your application calls for. That matters when you need a print for a passport application and a properly prepared digital file for an online submission. It also helps when your destination doesn’t use the same dimensions as the U.S. standard.
For local directions and service details, the storefront information at passport photos in Sugar Land on Hwy 6 is the most direct place to start.
The value here is straightforward. You avoid the common DIY problems, you don’t have to guess about sizing, and you can handle the task as part of a larger travel or shipping visit. For many applicants, that’s the difference between a smooth submission and another round of rework.
A CTA for Business Mail Boutique LLC.

Related posts

Custom Memorial Glasses Engraved in Three Hours in Sugar Land
When a customer needed eight personalized glasses for a memorial, Business Mail Boutique completed the engraving or...

Custom Martini Glass Engraving in Sugar Land, TX
Custom Logo Engraving on Martini Glasses in Sugar Land, Texas.
Business Mail Boutique recently completed a beautiful custom engravin...

Custom Engraved Wine Glasses for a Golf Club Event in Sugar Land, TX
Custom Engraved Wine Glasses for a Golf Club Event in Sugar Land.
Custom wine glass engraving in Sugar Land, TX at Business Mail Bouti...