
- Print Business Cards in Sugar Land – Same Day Service
- Copying Services
- Document Printing, Finishing & Lamination in Sugar Land
- Flyers
- Print Banner in Sugar Land | Same-Day Banner Printing Near Me
- Graphic Design
- Photo Printing
- Postcard Printing
- Document Printing
- EDDM Full Service Postcards
- FotoZoomer Large Format Printing


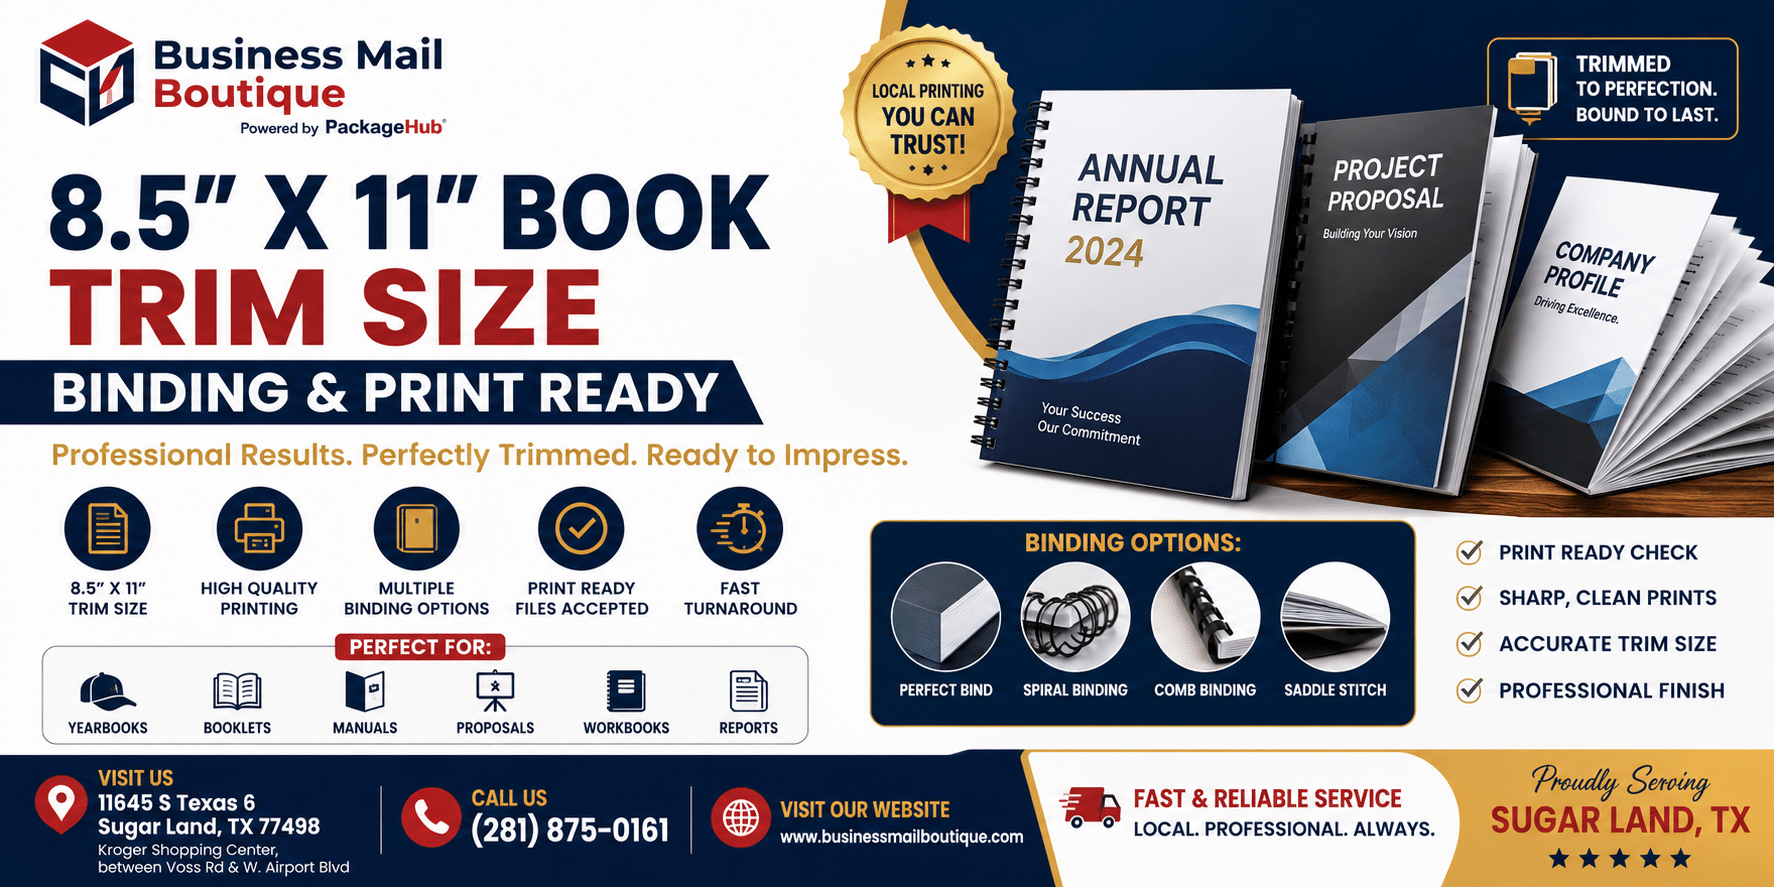
8.5 X 11 Book: Trim Size, Binding, and Print-Ready.
Plan and print an 8.5 x 11 book the right way. Learn trim size implications, binding options, interior layouts, and file prep tips for a polished result.
Businessmailboutique
11645 S. Hwy 6
Sugar land, Texas 77498 United States (US)
Email: info@businessmailboutique.com
Route
You’ve finished the manuscript, chosen the illustrations, and perhaps even built the cover. Then the printer asks for the trim size, binding, page count, and press-ready PDF, and a simple workbook suddenly becomes a production project. That’s the point where an 8.5 x 11 book either proves its value or exposes an expensive mismatch between the content, the reader, and the market.
The format gives diagrams, worksheets, tables, and images room to work. It also uses more physical space than a compact trade book, can create binding constraints, and may feel less familiar to readers outside North America. The practical decision comes down to four questions: Who will use the book, what must fit on each page, how will it be bound, and where will it be printed, shipped, and sold?
Table of Contents
- Why the 8.5 x 11 Book Format Still Matters in 2026
- How 8.5 x 11 Became the U.S. Letter Standard
- Comparing 8.5 x 11 With A4, 7 x 10, and 6 x 9
- Best Content Types for an 8.5 x 11 Book
- Binding Options and Spine Width for 8.5 x 11 Books
- Laying Out the Interior Pages of an 8.5 x 11 Book
- Print-Ready File Tips That Prevent Costly Reprints
- Bringing Your 8.5 x 11 Book Project Together
Why the 8.5 x 11 Book Format Still Matters in 2026
A trainer needs participants to write beside each exercise. A consultant’s manual depends on readable process diagrams. An educator needs tables, answer space, and instructions that remain clear at actual print size. In these projects, page dimensions shape how the book is used and sold, rather than serving as a cosmetic setting in layout software.
An 8.5 x 11 book measures 8.5 × 11 inches. Lulu’s book product type options identifies this size with the American full-size standard and lists manuals, reference books, and image-heavy educational content among its practical applications. The generous page area gives diagrams room to breathe, keeps tables from becoming cramped, and leaves space for notes or writing.
That extra area also has a cost. More paper can increase the finished book’s bulk, shipping weight, and package size. A thick workbook may be harder to bind comfortably, while a compact 7 x 10 or 6 x 9 edition may be easier to handle. For readers and printers outside North America, A4 may fit local paper supply, office habits, and distribution systems better than Letter size.
Four decisions to settle before layout
- Audience: A U.S. classroom, a corporate training department, and an international consumer audience may expect different page proportions.
- Content behavior: A workbook needs writing space. A novel needs comfortable continuous reading. A manual must keep diagrams legible beside instructions.
- Binding and handling: A book used flat on a desk has different requirements from a reference volume intended for shelf storage. Page count and paper choice can limit practical binding options.
- Distribution: Paper use, package dimensions, and shipping weight become more consequential when the book crosses borders or moves through several sales channels.
Practical rule: Choose the page shape from the reader’s hand and task, then test the binding and shipping consequences before final layout.
The format still fits U.S. office, education, and professional print workflows, so domestic readers often recognize it immediately. That familiarity does not settle the international choice. Compare A4, 7 x 10, and 6 x 9 against the manuscript’s working area, printer capabilities, binding plan, and destination market before committing.
How 8.5 x 11 Became the U.S. Letter Standard
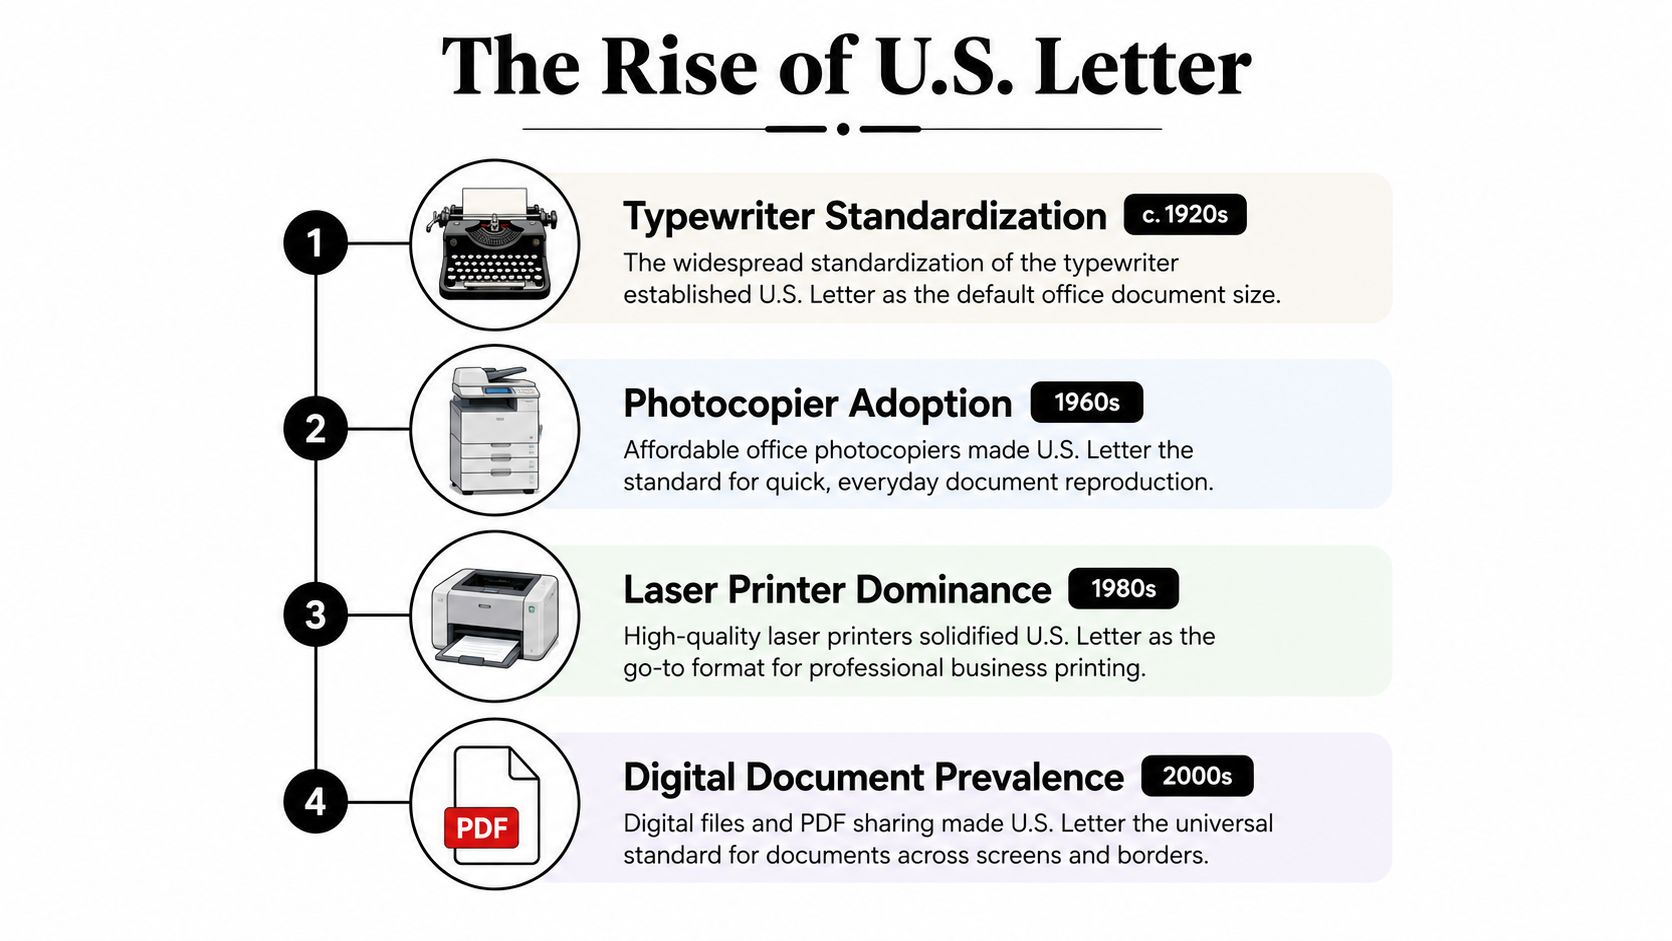
The dimensions weren’t selected randomly. Historical accounts connect the format to older papermaking practices, including a 44-inch sheet concept that could be folded or cut into four 11-inch lengths. The 8.5-inch width is traced to halving a 17-inch dimension, with room associated with trimming and watermarks. The exact origin remains debated, but the production logic is clear: paper sizes survived when mills, offices, and printers could use them consistently. These historical details are discussed in Marketplace’s account of how Letter paper reached 8.5 x 11 inches.
Office machines made the format sticky
Typewriters needed predictable sheet dimensions. Photocopiers and printers then reinforced those dimensions by using fixed paper trays and feed paths. Once offices purchased equipment built around Letter paper, switching sizes became inconvenient, even when another proportion might have been more elegant for a particular document.
The U.S. federal government strengthened that existing habit in the early 1980s, when the Reagan administration made Letter-size paper the norm for federal paperwork. The federal adoption didn’t create the format from nothing. It formalized a size already dominant in private offices and helped lock it into procurement, forms, and document workflows, as summarized in the history of Letter paper size).
Letter and A4 belong to different systems
The global comparison is important. ISO A4 measures 210 × 297 mm, or 8.27 × 11.69 inches, so it’s slightly narrower and longer than U.S. Letter. That difference is small on a screen but visible in production. A Letter document printed on A4 can leave extra space or require scaling, while an A4 document printed on Letter can lose content or need adjustment.
The result is a persistent two-standard ecosystem. The United States remains one of the few major markets centered on Letter rather than A4, so publishers must treat trim size as a regional production decision instead of assuming that an office-standard page is globally standard.
Comparing 8.5 x 11 With A4, 7 x 10, and 6 x 9
Trim size changes more than the visual impression of a book. It affects how much content fits on each page, how often readers turn pages, how much paper the finished volume consumes, and whether the object feels familiar in its sales market. For international distribution, A4 may feel locally normal, while Letter can look like an imported office document.
| Trim Size | Page Area | Best Fit |
|---|---|---|
| 8.5 x 11 | Largest of the listed formats, with broad working space | Workbooks, manuals, diagrams, tables, educational and image-heavy content |
| A4 | Similar overall scale to Letter, but narrower and longer | International business, educational, and technical documents where local standardization matters |
| 7 x 10 | Mid-size compromise between working room and portability | General nonfiction, guided journals, illustrated reference, and adaptable trade projects |
| 6 x 9 | Compact and easier to handle | Novels, narrative nonfiction, pocket-friendly guides, and shipping-conscious editions |
The 8.5 x 11 book earns its extra page area when the reader must see and use information at the same time. A full-page exercise, a technical drawing with labels, or a table with multiple columns can remain readable without forcing the designer into cramped type and narrow cells. The trade-off is physical. Larger pages generally require more paper than smaller trims, and the finished package can be heavier and less convenient to carry.
A4 deserves special attention if the audience is distributed across Europe, Asia, or other markets where ISO paper sizes dominate office and print workflows. It won’t solve every distribution issue, but it can make a document feel more native and reduce the friction of moving files between local printers, classrooms, and business systems.
When smaller formats work better
A 7 x 10 book is often a useful middle ground when a project needs some visual room but doesn’t require a full worksheet surface. It can support diagrams and generous typography while producing a less imposing object. 6 x 9 usually makes more sense for prose-led books, compact guides, and projects where readers prioritize portability over workspace.
Don’t choose Letter because the source manuscript was drafted on Letter paper. Drafting convenience is not the same as reader usability. The larger format should justify itself through the page task.
Best Content Types for an 8.5 x 11 Book
An 8.5 x 11 book earns its page area when readers must look, write, compare, and refer without zooming or turning between related details. That makes it suitable for workbooks, training manuals, reference books, cookbooks, and educational publications built around visual information. Lulu’s print guidance places the format among practical choices for projects that depend on diagrams, charts, tables, and large images.
A math workbook shows the advantage clearly. An explanation can sit beside practice problems, with room for calculations and a graph that remains usable. Reducing the same design to a smaller trim may preserve the text while leaving too little space for the activity.
Photography manuals use the format for a different reason. One page can combine an instructional image, caption, steps, and troubleshooting notes without forcing every element into a crowded layout. It also supports direct comparisons, such as an original photograph beside an annotated version.
Projects that usually benefit
- Workbooks: Exercises, response fields, grids, and checklists need writing surfaces that readers can use comfortably.
- Training manuals: Procedures often combine diagrams, callouts, warnings, and sequential instructions on one spread.
- Educational books: Maps, charts, music notation, scientific figures, and classroom activities need room to stay legible.
- Cookbooks: Ingredients, method steps, notes, and supporting images can share a page without excessive compression.
- Reference books: Tables and cross-references are easier to scan when entries do not break across several pages.
The format can also work for branded business materials intended as durable desk references. A company handbook, facilitator guide, or technical reference may feel more substantial at full size, particularly when readers consult it during work rather than carry it throughout the day.
Content that fights the page
Novels and compact narrative books rarely use the additional surface effectively. A large trim can produce short-looking lines, excess white space, and an awkward object for continuous reading. Pocket guides face the opposite constraint: portability matters more than workspace, so 6 x 9 may serve readers better.
Cross-border distribution can change the decision. If readers work primarily with ISO paper, A4 may fit local printers, classrooms, and office systems more naturally. A project that needs visual room but not a full worksheet surface may suit 7 x 10. Choose 8.5 x 11 when the page task clearly requires it, not because the manuscript began on Letter paper.
A large page should solve a visible problem. If readers are not writing, studying diagrams, or comparing information, the extra area may become paid-for empty space.
Binding Options and Spine Width for 8.5 x 11 Books
Binding determines whether the finished book behaves like a workbook, a shelf-ready publication, or a durable reference object. The broad page of an 8.5 x 11 book doesn’t remove those constraints. It can make a thick volume feel more substantial, but it also increases the importance of paper choice, page count, opening behavior, and the usable gutter.
Match the binding to the job
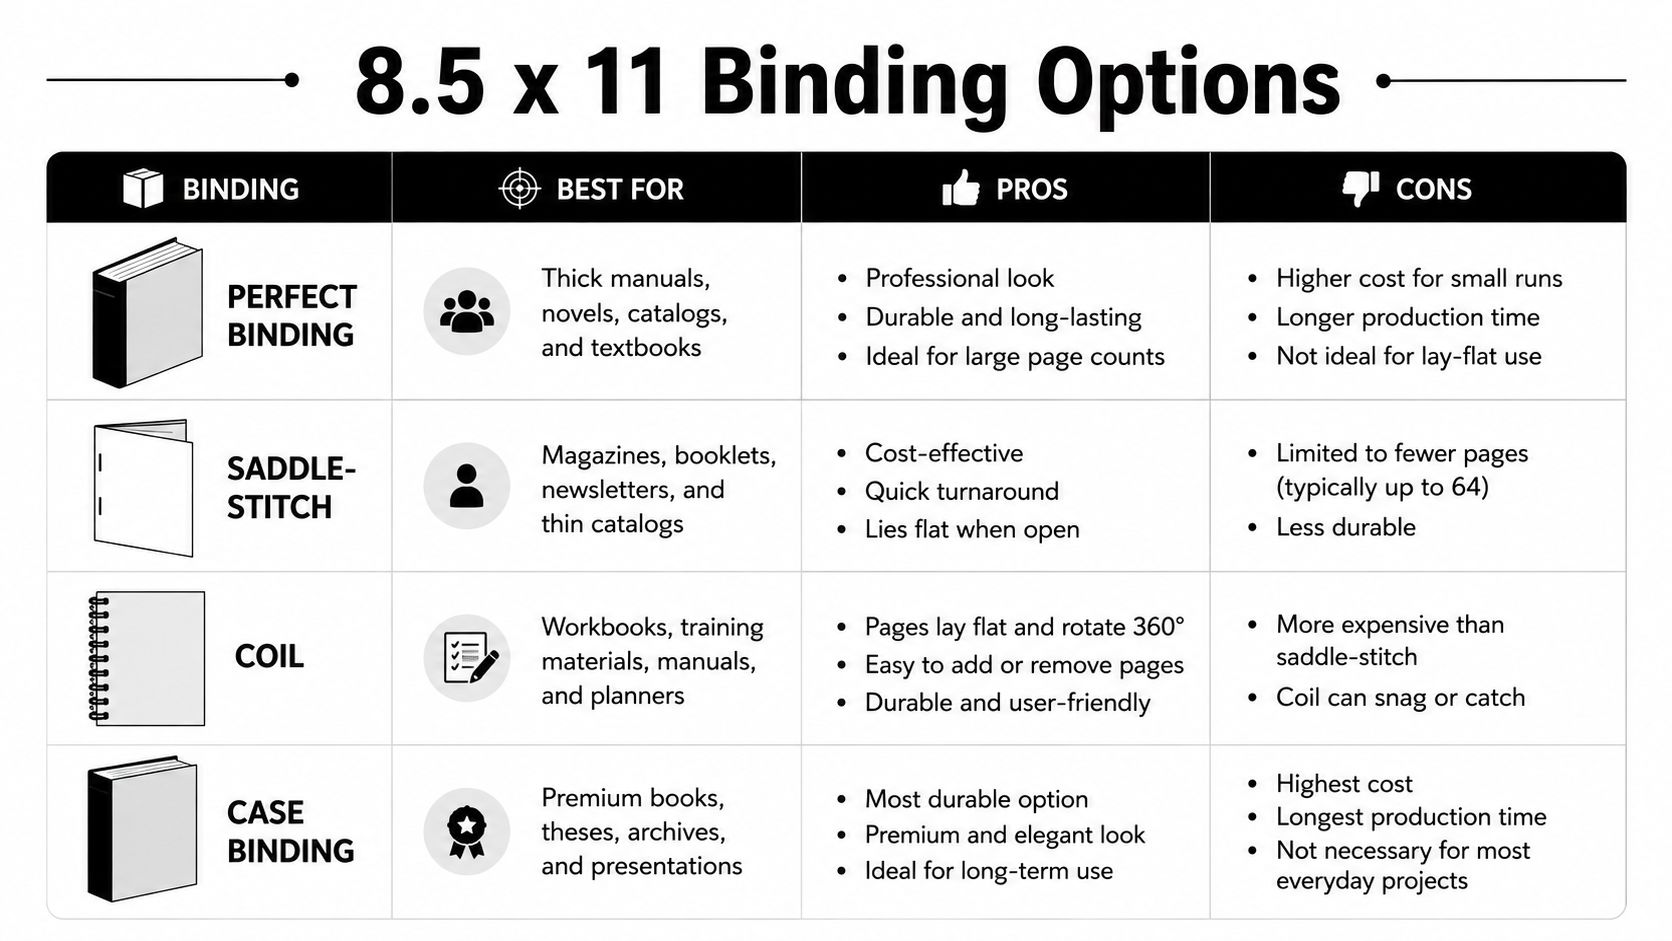
Perfect binding uses adhesive along the spine and gives manuals and books a conventional, printable spine. It works well when the project needs a professional trade appearance, but the spine width depends on the sheet count. The perfect-bound book production guide gives the formula sheet count × 0.0039 + 0.02, and states a maximum of 400 sheets, or 800 pages. That ceiling matters before design begins because pagination affects adhesive area and binding feasibility.
Saddle-stitching folds and staples printed sheets. It suits thinner booklets, short course materials, and handouts, but it doesn’t provide the same substantial spine as perfect binding.
Coil binding is practical for workbooks, recipe books, and manuals that need to lie flat. The coil occupies edge space, so keep important text and graphics away from the punching area. It’s highly functional, though some retail environments treat it more like a training product than a conventional book.
Case binding creates a hard cover and a durable structure for archival or presentation use. It typically costs more and requires careful cover and board specifications, so it’s best reserved for projects where longevity or perceived value justifies the production complexity.
For a more detailed look at finishing decisions, professional book binding services and finishes can help you compare practical options before finalizing the file.
Calculate before you design
Use the sheet formula early, not after the interior is complete. A page-count change can alter the spine, cover template, and binding method. Perfect binding also needs a sufficient gutter because adhesive and the curve of the spine reduce the comfortable reading area near the inner edge.
Production check: Get the printer’s exact paper thickness and binding specification before you build the cover. A calculated spine is only useful when it uses the printer’s stock.
Laying Out the Interior Pages of an 8.5 x 11 Book
A large page invites large mistakes. Designers often fill the available area with more content, then discover that the page feels crowded despite its generous dimensions. The solution is to create a repeatable grid before placing diagrams, tables, captions, and writing fields.
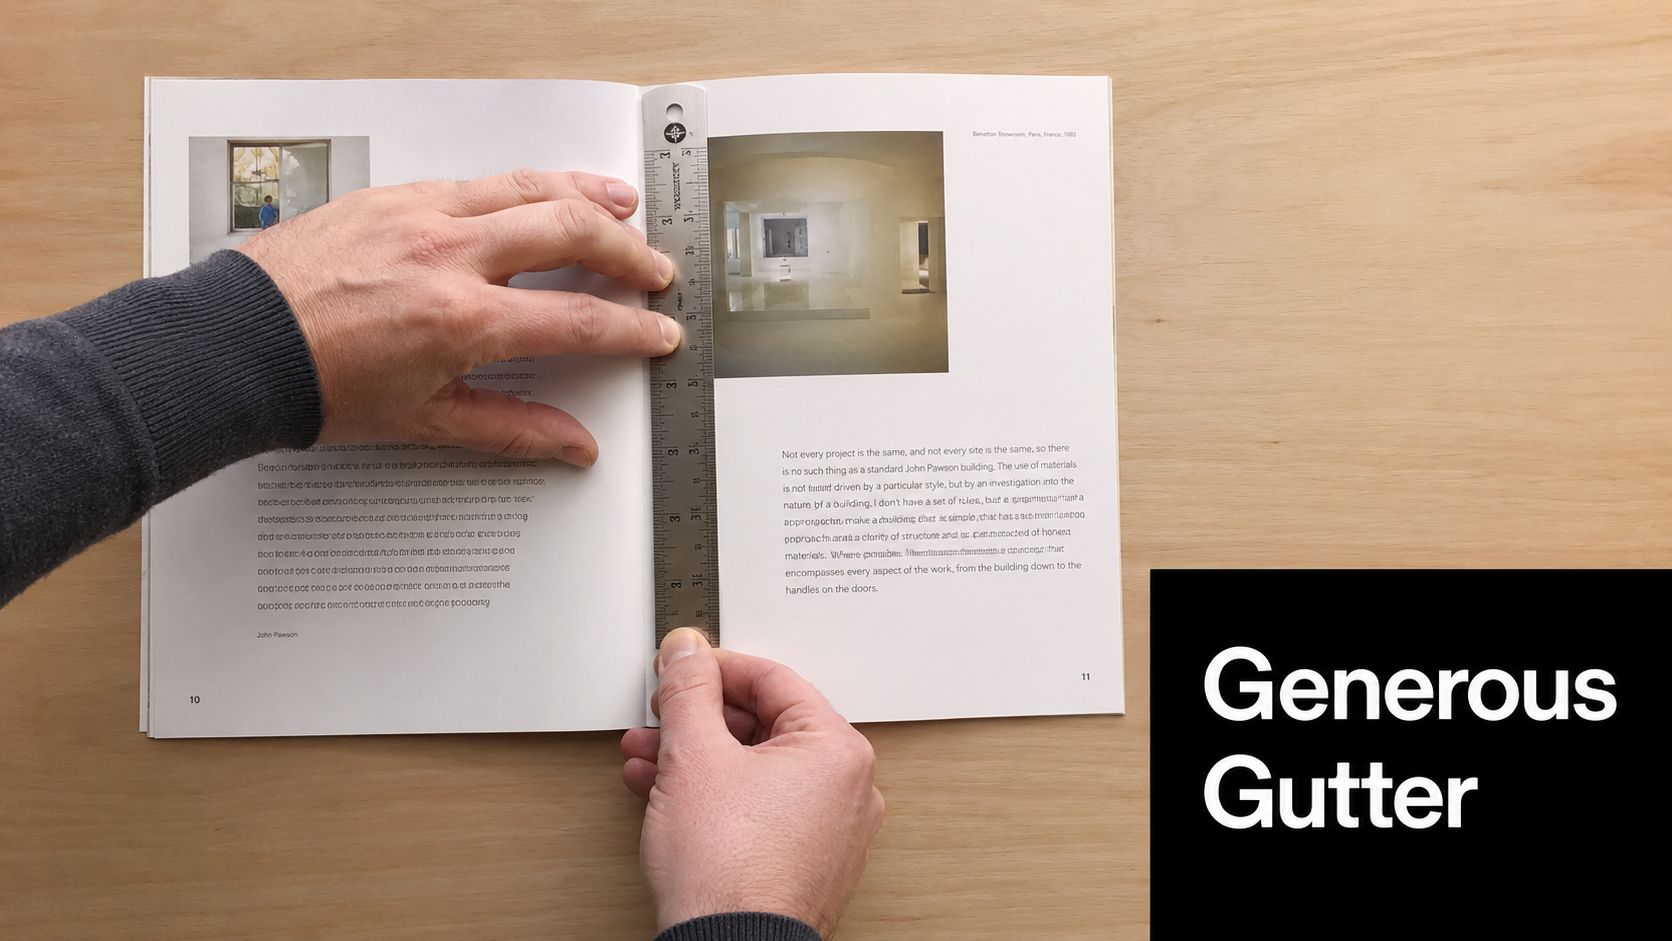
Start by defining the trim area, safe margins, and gutter. The inner margin needs more protection than the outer margin because binding consumes visual space. Perfect-bound pages can pull text toward the spine, while coil-bound pages need clearance for punched holes. The correct values depend on the printer, paper, binding, and page count, so use the printer’s template rather than relying on a universal setting.
Build the page around reading tasks
Use a modular grid for recurring elements. A manual might reserve one column for instructions and a wider area for a diagram. A workbook may use a consistent header, exercise zone, response area, and footer. A cookbook can separate ingredients from method steps while keeping notes visually distinct.
Use the larger page for hierarchy, not decoration. Increase the space around headings, keep tables aligned to a consistent baseline, and avoid placing a critical label too close to the gutter or trim edge. Full-width elements can create strong visual rhythm, but only when they don’t force the reader to search for the next step.
If terms such as trim, slug, live area, and gutter are unfamiliar, the book formatting glossary provides a useful reference while you set up the document.
A preflight conversation with a print provider can also prevent layout assumptions from becoming production errors. For related commercial print planning, this guide to brochure printing covers finishing and file considerations that overlap with book interiors.
Place the video after the page structure is established so it supports the measurement decisions rather than interrupting them.
Images need production discipline
Keep important images large enough for the intended print size, and inspect them at actual size rather than trusting a zoomed-out screen preview. Soft source images remain soft when printed. Convert or prepare color according to the printer’s specification, especially for photographs and edge-to-edge illustrations.
Before exporting, print representative pages on a desktop printer. Check whether captions are readable, whether writing lines leave enough room, and whether the inside margin feels cramped when two pages are held open. A physical proof catches usability problems that a design application can hide.
Print-Ready File Tips That Prevent Costly Reprints
Most reprint problems begin with a file that looked acceptable on screen. A printer can’t correct every missing bleed, substituted font, or color mismatch after submission. Treat the final PDF as a production package, not merely an export of the layout.
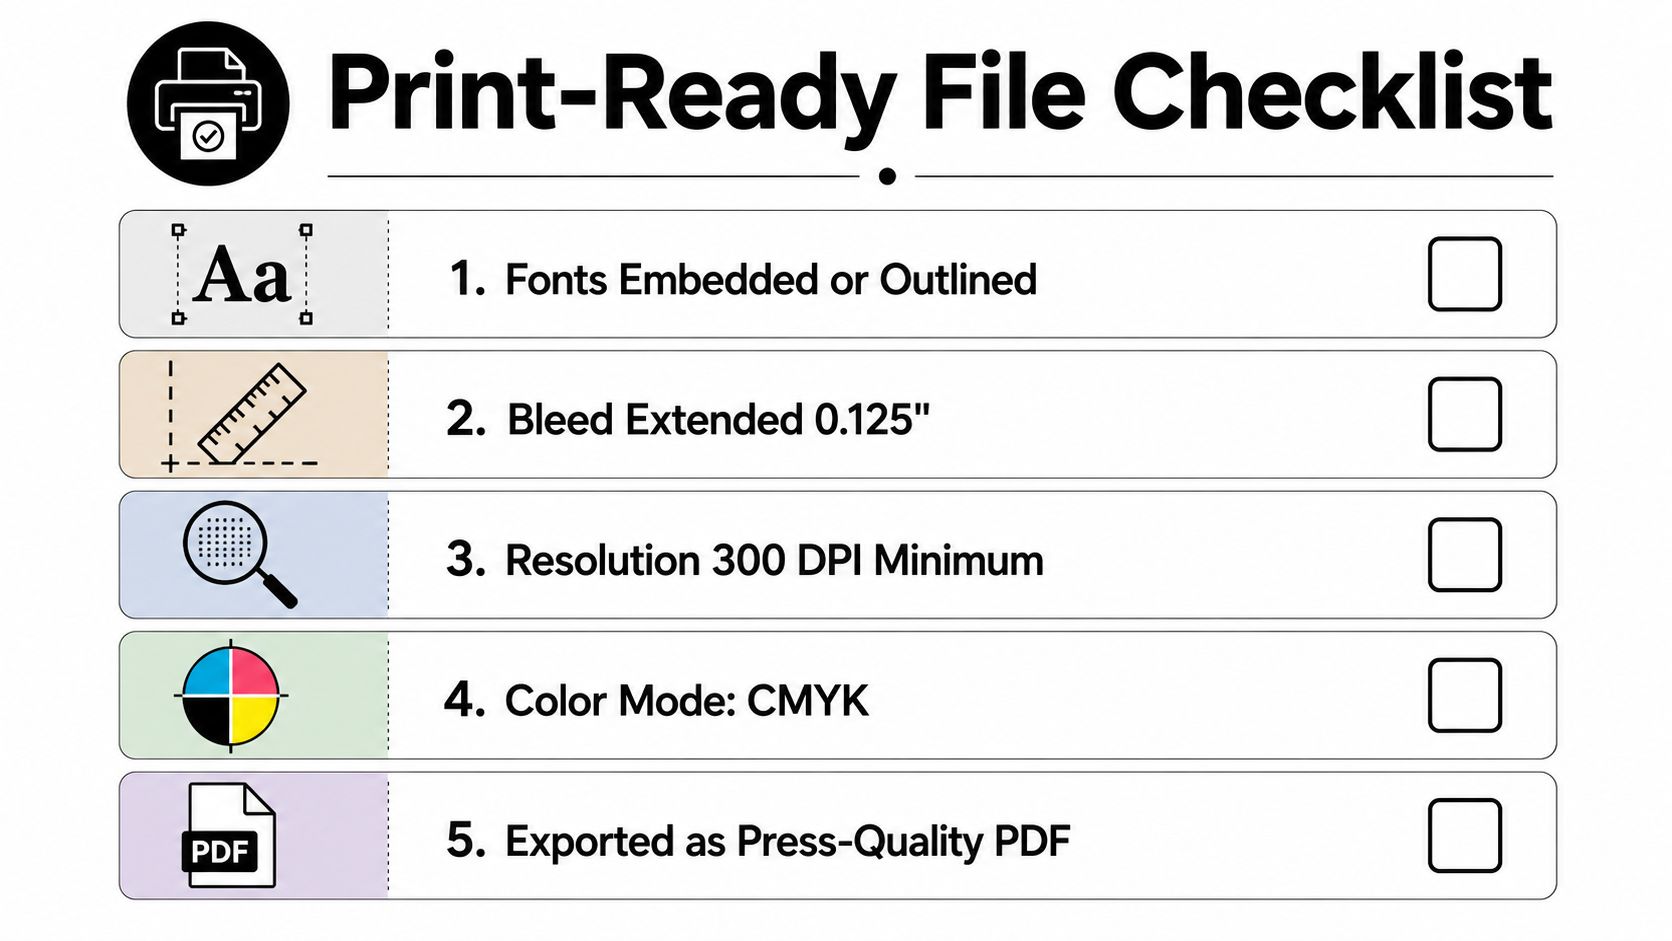
Run this preflight before upload
- Confirm the document size: The interior page size must match the selected trim. Don’t use a Letter-sized source file for an A4 edition without rebuilding and checking the layout.
- Extend edge images through the bleed: Any background, photo, or color that reaches the trim edge must extend beyond the cut line. Missing bleed can leave a thin unprinted strip after trimming.
- Check fonts: Embed fonts in the PDF or outline them when the workflow requires it. A missing font can cause substitutions, reflow, or unexpected line breaks.
- Prepare color correctly: Ask the printer whether the job requires CMYK and which profile, such as SWOP or FOGRA, should be used. RGB artwork may print with colors that look different from the monitor.
- Inspect image resolution: Low-resolution images can produce visible softness, jagged edges, or blurry small text inside graphics. Review every placed image at its final size.
- Export a press-quality PDF: Use the printer’s preferred PDF preset, include the required marks only when requested, and avoid compressing images aggressively.
Proof the pages that carry risk
Don’t inspect only the title page. Print a table-heavy spread, a full-bleed image page, a page near the center gutter, and the final page. For a workbook, write on a sample exercise. For a manual, follow a procedure using only the printed page and see whether the sequence remains clear.
Digital printing services may be suitable for short-run projects and revised editions, but the file still needs to meet the provider’s specifications. Ask for a physical proof when color, alignment, or image placement directly affects the product.
Keep the cover as a separate production problem. Its spine depends on the final interior, and its bleed, barcode area, color treatment, and front-to-back wrap must follow the printer’s template. Never finalize cover typography before the trim and binding are locked. A cover that looks balanced on a blank template can become crowded once the calculated spine is added.
Bringing Your 8.5 x 11 Book Project Together
An 8.5 x 11 book is the right choice when the reader needs a working surface. Workbooks, manuals, reference books, educational titles, cookbooks, and image-heavy publications can use the page area to improve legibility and organization. The same format can underperform for novels, pocket guides, and internationally shipped books where portability and local standardization matter more.
Make the decisions in this order:
- Define the audience and market. Decide whether the primary reader expects U.S. Letter, A4, or a more compact trade format.
- Test the content on the page. Place the densest table, largest diagram, or longest exercise into a sample layout.
- Choose the binding from the use case. Select perfect, saddle-stitch, coil, or case binding based on how readers will open, write in, store, and reuse the book.
- Build the production file last. Set margins, gutter, bleed, color, fonts, and image handling from the printer’s specifications.
Cover design deserves the same discipline as the interior. A practical book cover typography workflow can help you manage hierarchy, spine treatment, and readable type once the physical dimensions are fixed.
Your next step is concrete: choose one target audience, create a representative two-page spread, and ask a printer to confirm the trim, binding, paper, spine calculation, and PDF requirements before laying out the full manuscript.
Business Mail Boutique LLC provides printing, document finishing, binding, packing, shipping, and related business services for book projects through its Sugar Land storefront. Visit Business Mail Boutique LLC to discuss your print-ready files, binding needs, and delivery plan before production.

Related posts

Custom Memorial Glasses Engraved in Three Hours in Sugar Land
When a customer needed eight personalized glasses for a memorial, Business Mail Boutique completed the engraving or...

Custom Martini Glass Engraving in Sugar Land, TX
Custom Logo Engraving on Martini Glasses in Sugar Land, Texas.
Business Mail Boutique recently completed a beautiful custom engravin...

Custom Engraved Wine Glasses for a Golf Club Event in Sugar Land, TX
Custom Engraved Wine Glasses for a Golf Club Event in Sugar Land.
Custom wine glass engraving in Sugar Land, TX at Business Mail Bouti...