
- Print Business Cards in Sugar Land – Same Day Service
- Copying Services
- Document Printing, Finishing & Lamination in Sugar Land
- Flyers
- Print Banner in Sugar Land | Same-Day Banner Printing Near Me
- Graphic Design
- Photo Printing
- Postcard Printing
- Document Printing
- EDDM Full Service Postcards
- FotoZoomer Large Format Printing


Brochure Printing: Your Complete 2026 Guide
Businessmailboutique
11645 S. Hwy 6
Sugar land, Texas 77498 United States (US)
Email: info@businessmailboutique.com
You’re probably here because the brochure project has finally become real. Maybe you need something polished for a trade show next week, a leave-behind for sales calls, or a simple handout that explains your services better than a rushed conversation at the counter ever could.
That’s usually the point where small business owners discover brochure printing isn’t just “send a file and pick paper.” A brochure has to do a job. It has to read clearly, fold correctly, look like your brand, and arrive on time. If any one of those pieces slips, you feel it in wasted prints, missed deadlines, or a stack of brochures you’re not excited to hand out.
A good local print shop helps you avoid that. You get advice before you spend money, a physical proof before the full run, and someone you can talk to when the fold, paper, or deadline suddenly matters more than it seemed online.
Table of Contents
- Planning Your Brochure for Maximum Impact
- Designing and Preparing a Print-Ready File
- Choosing the Right Paper Finish and Fold
- Navigating the Local Printing Process
- Understanding Pricing and Getting the Best Value
- From Collection to Distribution Your Final Steps
Planning Your Brochure for Maximum Impact
A brochure works best when you treat it like a sales tool, not decoration. Print still earns attention because printed materials can have a 70–80% better recall rate than digital ads, and print flyers can reach response rates up to 4.4%, compared with about 0.6% for email, according to print marketing statistics compiled here. That only helps you if the piece has a clear purpose.

Start with the job the brochure needs to do
Before anyone opens Canva, Adobe InDesign, or Illustrator, answer one question: what is this brochure supposed to accomplish? The answer changes everything that follows.
A trade show brochure needs fast scanning, clear service categories, and an easy next step. A brochure for a medical office lobby needs reassurance, readability, and basic service explanations. A restaurant handout needs simple navigation and fast decision-making.
Use these three planning prompts:
- Primary action: Do you want the reader to call, visit, book, scan a QR code, or keep the brochure for later?
- Reading environment: Will they read it standing up, sitting in a waiting room, or sorting through a stack after an event?
- Shelf life: Is this for a one-time promotion or something that needs to stay relevant for months?
Practical rule: If you can’t describe the brochure’s single job in one sentence, the design will probably try to do too much.
Narrow the audience and sharpen the message
Most weak brochures fail before printing. They try to talk to everyone, so they end up sounding generic.
A better approach is to write for one buyer type. If you serve homeowners, don’t fill the panel with internal jargon. If you sell B2B services, lead with problems you solve, not a long company history. If you offer multiple products, separate them cleanly instead of forcing everything onto the front panel.
A simple message stack works well:
- Headline first: State the main benefit quickly.
- Support second: Add two or three points that explain how you help.
- Proof third: Show examples, categories, service details, or process.
- Action last: Tell them what to do next.
If your brochure is product-heavy, this guide to effective product catalog creation is useful for organizing items without turning the layout into a crowded parts sheet. The same logic applies to brochure panels. Group related information so the eye knows where to go next.
When you’re ready to move from strategy into production, it helps to review what a printer can produce and finish through a service such as marketing material printing. That conversation often saves a redesign later.
Designing and Preparing a Print-Ready File
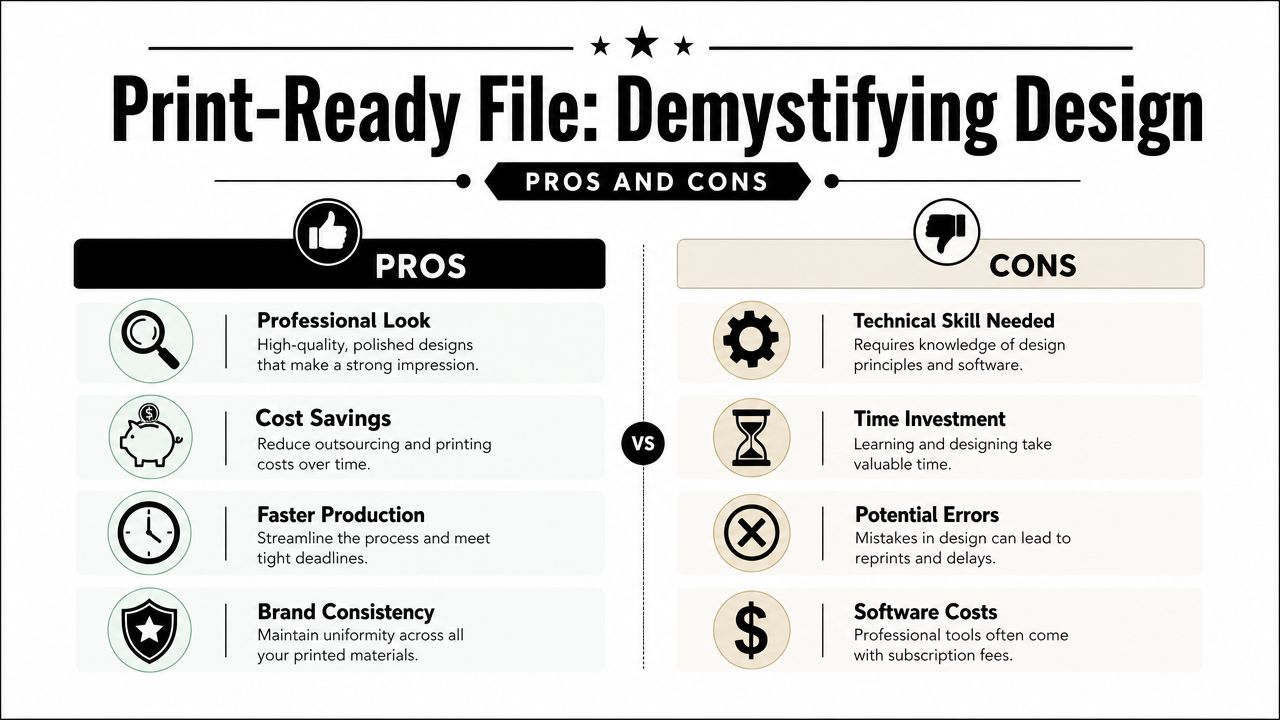
Often, many first brochure jobs go sideways. The design may look fine on a laptop and still print with muddy color, blurry photos, or text sitting too close to the trim. Good brochure printing starts with a file built for press, not just for screen.
Get the three technical settings right
The core production standards are straightforward. A solid brochure file uses CMYK, 300 dpi images, bleed past the trim line, and a safe zone for important content, with a press-ready PDF as the common delivery format, as outlined in this brochure file preparation guidance.
Think of these settings in practical terms:
| Setting | What it means | Why it matters |
|---|---|---|
| CMYK | Print color mode | Screen colors don’t always translate cleanly to ink |
| 300 dpi | High-resolution images | Low-res photos look soft or pixelated in print |
| Bleed | Background extends past trim | Prevents white slivers on the edge after cutting |
| Safe zone | Text stays inside a protected area | Keeps logos and copy from getting clipped |
If you’re hiring a designer, ask whether the file was built for print from the start. If it began as a social graphic or web flyer, someone may need to rebuild it properly. That’s not overkill. It’s cheaper than discovering the problem after folding and trimming.
Three mistakes show up all the time:
- Crowded panels: Too much copy makes the brochure feel harder to read than it is.
- Low-quality images: Phone screenshots and website downloads usually don’t hold up.
- Wrong color mode: RGB artwork can shift when converted for print.
A digital mockup can hide problems that become obvious the moment ink hits paper.
Export like a printer will handle it
A brochure doesn’t live as an open design file forever. At some point, it becomes a production file moving through prepress, printing, trimming, scoring, and folding. Export with that reality in mind.
A practical checklist before you send it:
- Confirm the final size: Standard 8.5″ x 11″ is common because it fits standard equipment and many mailers.
- Check the fold panel setup: Tri-folds, bi-folds, and z-folds don’t all divide the page the same way in production.
- Embed or outline fonts: Missing fonts can alter line breaks and spacing.
- Review every panel in order: Front cover, inside spread, and back panel should all read logically.
Font handling often receives insufficient attention. A font issue can create reflow, awkward spacing, and even licensing trouble if assets move between designer and printer. If your team uses downloaded fonts from mixed sources, this guide to safe font usage is worth reviewing before final export.
For non-designers, the safest path is usually this: build the content carefully, let a printer review the setup, then export a press-ready PDF only after size and fold are confirmed. That short review can prevent the kind of error that forces a full reprint.
Choosing the Right Paper Finish and Fold
Paper is part of the message. People notice weight, surface, stiffness, and how the folds open. Those details shape whether your brochure feels polished, practical, upscale, or disposable.
Match the paper to how the brochure will be used
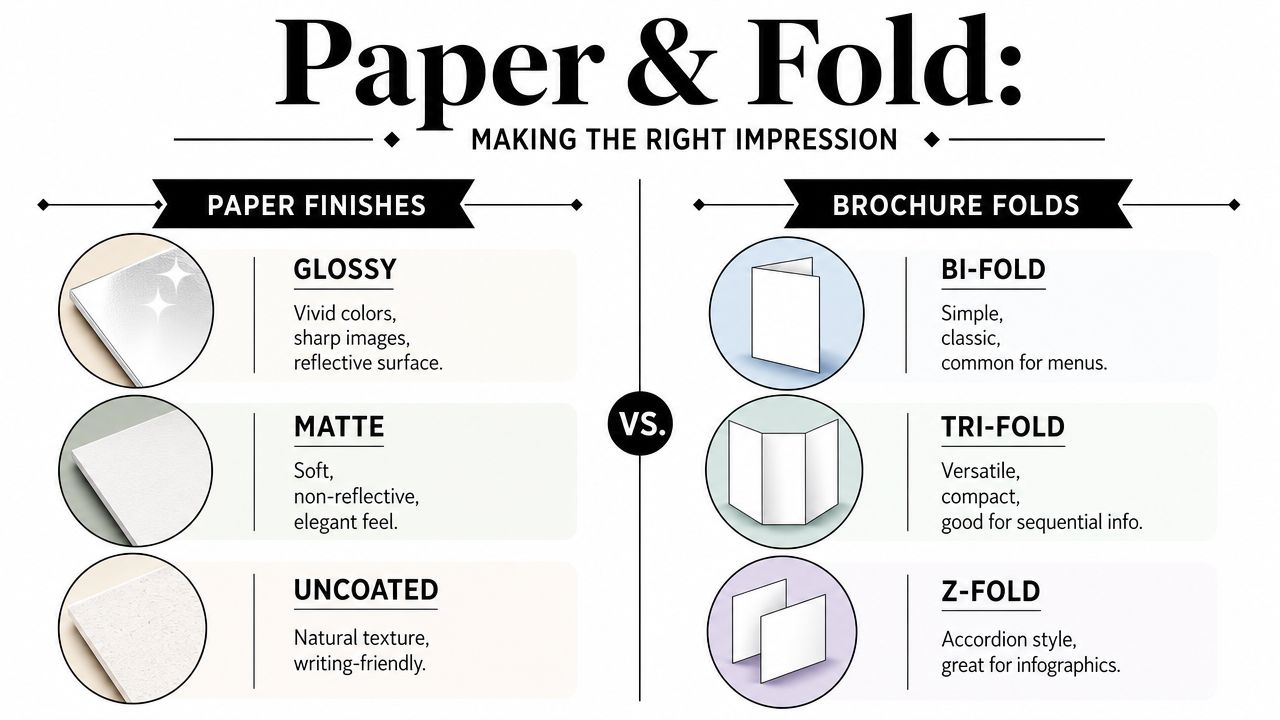
Paper choice should follow use case. According to this paper stock guidance for brochure printing, heavier coated stocks improve image quality and perceived value, while lighter stocks are better for mailing, and requesting paper samples is important because stock affects both color rendering and fold quality.
That means the right stock depends on where the brochure will live:
- Counter handouts: A heavier sheet often feels more substantial in the hand.
- Direct mail pieces: Lighter stock can reduce mailing friction.
- Writable brochures: Uncoated stock works better when customers need to jot notes.
- Image-heavy pieces: Coated stock usually gives photography more punch.
A paper sample book helps, but seeing the actual stock in person is better. Touch matters here. So does fold performance. Some papers look great flat and behave poorly once scored and folded.
Shop-floor advice: Never choose paper by name alone. Ask to see it printed, folded, and handled.
If you’re comparing options from different vendors, a commercial printer’s service page like commercial printing service can help you narrow what formats and finishing options are realistically available before you finalize the design.
Choose a fold that helps the message travel
The fold should support the reading flow and distribution method. Too many panels can create visual clutter and production complexity without making the brochure more useful.
Here’s a practical comparison:
| Fold type | Best for | Watch out for |
|---|---|---|
| Bi-fold | Menus, event sheets, simple company overviews | Fewer panels means less room |
| Tri-fold | Services, step-by-step information, leave-behinds | Easy to overcrowd if copy isn’t edited |
| Z-fold | Sequential storytelling, visual walkthroughs | Needs clear panel planning |
A short video can help if you want to see fold formats in action before choosing one.
The right fold also depends on how the brochure moves through the world. If it needs to fit an envelope, sit in a display rack, or work as a self-mailer, those limits should drive the decision earlier than might be initially considered.
Navigating the Local Printing Process
Ordering from a local shop usually feels different from uploading a file to a large website. It’s more conversational, and that’s a good thing. Brochure printing has small details that are easier to solve when someone can look at your file, pull paper samples, and catch issues before the press run starts.
What a smooth order usually looks like
A typical local order starts with a short conversation. What size do you need? How many? Will it be handed out, mailed, or displayed? Do you need folding, scoring, or trimming by a certain date?
Then the shop reviews the file and flags practical concerns. Maybe the fold line runs through a phone number. Maybe the photos are too soft. Maybe the stock you picked is going to mail poorly. Those aren’t sales tactics. They’re the kinds of problems experienced print staff see every week.
The strongest part of the local process is the proof. A physical proof catches things a monitor won’t show clearly, especially panel balance, color feel, and whether the brochure reads naturally once folded.
“If you’re unsure, print one first” is still some of the cheapest advice in this business.
Why local proofing changes the outcome
Print carries built-in trust. One cited print marketing summary says 82% of consumers trust print advertisements when making a purchasing decision, as noted in these print marketing statistics. For a local business, that credibility grows when the piece looks intentional and professionally produced.
That’s where a local partner earns their keep. You can walk in with questions, compare stocks side by side, and approve a proof without guessing from a screen. If a deadline tightens, local turnaround can also matter more than people expect. Same-day or rush service isn’t needed on every order, but when an event date moves or a sales opportunity pops up, it’s useful to understand the realities of same-day success with rush printing.
Business Mail Boutique LLC is one local option for small businesses that need marketing print materials alongside shipping and office services. That kind of one-counter setup can be practical when the brochures also need to be packed, mailed, or sent to an event.
Understanding Pricing and Getting the Best Value
Most brochure quotes come down to five levers: quantity, size, paper, finish, and turnaround. If you change any one of them, the price can move quickly. The trick isn’t finding the cheapest brochure. It’s spending where the choice affects results and saving where the customer won’t notice.
What really moves the quote
Quantity changes unit cost, but quantity alone doesn’t decide value. Ordering too few often means reordering too soon. Ordering too many can leave you with outdated brochures after a service change, price update, or rebrand.
A few choices usually have the biggest effect:
- Paper stock: Heavier and coated stocks often cost more than lighter sheets.
- Finish and folding: Extra finishing steps add labor and setup.
- Size: Standard sizes are usually simpler to produce than unusual formats.
- Speed: Rush jobs often reduce your flexibility.
One useful production reality is that the brochure’s fold format affects mailing efficiency. According to this brochure format and distribution reference, standard folds on an 8.5″ x 11″ sheet are often chosen because they work well for self-mailers and standard envelopes. That’s a design decision with budget consequences.
Where to save and where not to cut corners
The best value often comes from simplification, not downgrading everything.
Save money here when you can:
- Use a standard size: It tends to fit common equipment and finishing workflows.
- Keep the fold simple: More panels aren’t automatically more persuasive.
- Plan ahead: Time gives you more room to proof and compare options.
Don’t cut corners here:
- Proofing: Reprints cost more than one sample.
- Image quality: Blurry photos make the whole piece feel cheaper.
- Readable layout: If customers can’t scan it quickly, the print investment is wasted.
A good printer will usually help you balance these trade-offs. Sometimes the smartest move is trimming a panel count, not the paper. Sometimes it’s ordering enough to cover the campaign rather than chasing the absolute lowest starting quote.
From Collection to Distribution Your Final Steps
Pickup day should be simple, but don’t rush it. Open the box. Flip through a handful of copies. Check the folds, color consistency, front-to-back alignment, and whether the quantity appears packed as expected.
What to check at pickup
Look at the brochure the way your customer will:
- Front panel first: Does it feel clean and easy to understand?
- Inside flow: Do the panels open in the right reading order?
- Fold quality: Are the creases neat, with no cracking or awkward buckling?
- Trim and finish: Do edges look clean and consistent?
If anything feels off, say so before you leave. Local shops can address questions faster when the job is still at the counter and the production details are fresh.
Pick up one brochure, fold it, unfold it, and read it standing up. That quick test catches more than staring at a stack.
Put the brochures to work right away
The most common mistake after printing is letting the brochures sit. A brochure only earns its keep once it gets into the right hands.
Use them intentionally:
- Stock your front desk or lobby if customers ask the same service questions repeatedly.
- Include them in outgoing packages if you already ship products or materials.
- Bring them to sales meetings and local events as structured leave-behinds.
- Pair them with direct mail when geography matters more than digital reach.
- Ship them to trade shows or off-site events before your team arrives.
This is also where working with a business center can simplify the next step. If your printer also handles packing, shipping, mailbox services, or mail prep, you can move from production to distribution without juggling multiple vendors. That’s especially useful for conference materials, local mail drops, and response handling tied to a dedicated business address.
A brochure should keep working after it’s printed. If it’s well planned, properly prepared, and produced with a local shop that catches issues early, it becomes one of the most reliable pieces in your marketing toolkit.
If you’re getting ready to print brochures and want a local place to review your file, talk through paper and fold options, and handle the next step after printing, Business Mail Boutique LLC offers printing, packing, shipping, and mailbox services from one Sugar Land location.

Related posts

Custom Memorial Glasses Engraved in Three Hours in Sugar Land
When a customer needed eight personalized glasses for a memorial, Business Mail Boutique completed the engraving or...

Custom Martini Glass Engraving in Sugar Land, TX
Custom Logo Engraving on Martini Glasses in Sugar Land, Texas.
Business Mail Boutique recently completed a beautiful custom engravin...

Custom Engraved Wine Glasses for a Golf Club Event in Sugar Land, TX
Custom Engraved Wine Glasses for a Golf Club Event in Sugar Land.
Custom wine glass engraving in Sugar Land, TX at Business Mail Bouti...