- Print Business Cards in Sugar Land – Same Day Service
- Copying Services
- Document Printing, Finishing & Lamination in Sugar Land
- Flyers
- Print Banner in Sugar Land | Same-Day Banner Printing Near Me
- Graphic Design
- Photo Printing
- Postcard Printing
- Document Printing
- EDDM Full Service Postcards
- FotoZoomer Large Format Printing


UK Passport Photos.
UK passport photos explained: dimensions, background, lighting, glasses rules, child rules, and where to get compliant photos that pass first time.
Businessmailboutique
11645 S. Hwy 6
Sugar land, Texas 77498 United States (US)
Email: info@businessmailboutique.com
Route
You’re standing outside the post office with two passport prints in your hand, or hovering over the upload button on GOV.UK, wondering whether the photo looks “good enough.” It may look fine as a portrait and still fail as a passport document. UK passport photos are assessed for identity, clarity, composition, and technical compliance, so a small detail such as a shadow, reflection, or unsuitable crop can create avoidable delay.
The safest approach is to treat the image like a form with visual fields. Check each requirement before you submit, use the current official GOV.UK photo requirements as your authority, and retake anything that leaves doubt. The guide below focuses on the decisions you can control at home, from the wall behind you to the file you upload.
Table of Contents
- Why UK Passport Photos Get Rejected More Than You Think
- Exact Size, File, and Recency Rules You Must Follow
- Background, Lighting, and the Glasses Rule Explained
- Expression, Framing, and What a True Likeness Really Means
- Rules for Babies and Children That Trip Up Parents
- Where to Get UK Passport Photos That Actually Pass
- Pre-Submission Checklist and the Most Common Rejection Reasons
- What to Do Next With Your Compliant Photo
Why UK Passport Photos Get Rejected More Than You Think
You’ve taken the picture, printed it, and noticed nothing obviously wrong. Your face is visible, the lighting seems acceptable, and the background looks nearly plain. That confidence can disappear when the image is reviewed against formal requirements rather than judged as an ordinary photograph.
UK passport photography has a long history of standardisation. A photograph of the passport holder became a requirement in 1914, and by 1926 the booklet required two duplicate, unmounted photographs showing a full-face view with no hat, as described in this history of passport photographs. The modern process follows the same basic principle, officials need a consistent image that can be matched to the person carrying the document.
A compliance document, not a casual portrait
Most problems come from recurring choices, not bad luck. A person submits a smiling image because it looks friendly. Someone else leaves glasses on because the lenses are clear. Another applicant uses an editing tool to improve skin tone or remove a background mark. Each choice can make the photograph less reliable as an identity image.
GOV.UK connects current requirements with ICAO photographic standards and says the image must be a true likeness of the holder. That means online advice, old passport memories, and high-street folklore shouldn’t replace the current official instructions.
Practical rule: If you can identify a possible objection before submission, retaking the photo is usually safer than asking an examiner to overlook it.
A useful distinction also matters here. Learning how visual documents are checked can help you recognise suspicious alterations in other contexts, so this guide to spotting fake IDs provides broader background on document-photo authenticity. It isn’t a substitute for GOV.UK guidance, but it reinforces why unedited, natural images matter.
Exact Size, File, and Recency Rules You Must Follow
Technical mistakes can make an otherwise suitable photograph unusable. Start by identifying the application route, because paper and digital submissions have different deliverables.
For a paper application, you need two identical printed photographs. For an online application, you need one digital image. Both versions must have been taken within the last month, so an older photograph shouldn’t be reused because your appearance hasn’t changed much. The current values and conditions are set out on the GOV.UK passport photo requirements page.
| Requirement | Printed Photo | Digital Photo |
|---|---|---|
| Submission format | Two identical printed photos | One digital photo |
| Recency | Taken within the last month | Taken within the last month |
| Colour and editing | Clear colour image, unedited | Clear colour image, unedited |
| Minimum dimensions | Printed to the required passport-photo size | At least 600 pixels wide by 750 pixels tall |
| File size | Not applicable | Between 50 KB and 10 MB |
Printed UK passport photos are generally prepared at 35 mm by 45 mm once trimmed. Because the official GOV.UK page is the controlling source, check it before printing rather than relying on a template saved from an older application or a different country’s standard.
Check the digital file, not just the picture
A digital photo can look sharp on a phone and still fail the technical check. Confirm that the file is in colour, clear, focused, and unedited. Don’t apply portrait blur, beauty filters, artificial background changes, or retouching that alters your appearance.
If the file is too large, use a reputable image compression tool, then check that compression hasn’t introduced blur or visible artefacts. If you’re preparing a printed image, review the broader ID photo requirements for passports and visas before sending it to a printer.
Keep the original capture until the application is complete. Exporting, messaging, and repeatedly saving a file can change its quality or size. Before upload, inspect the final file itself, not an earlier version that may have met the requirements.
Background, Lighting, and the Glasses Rule Explained
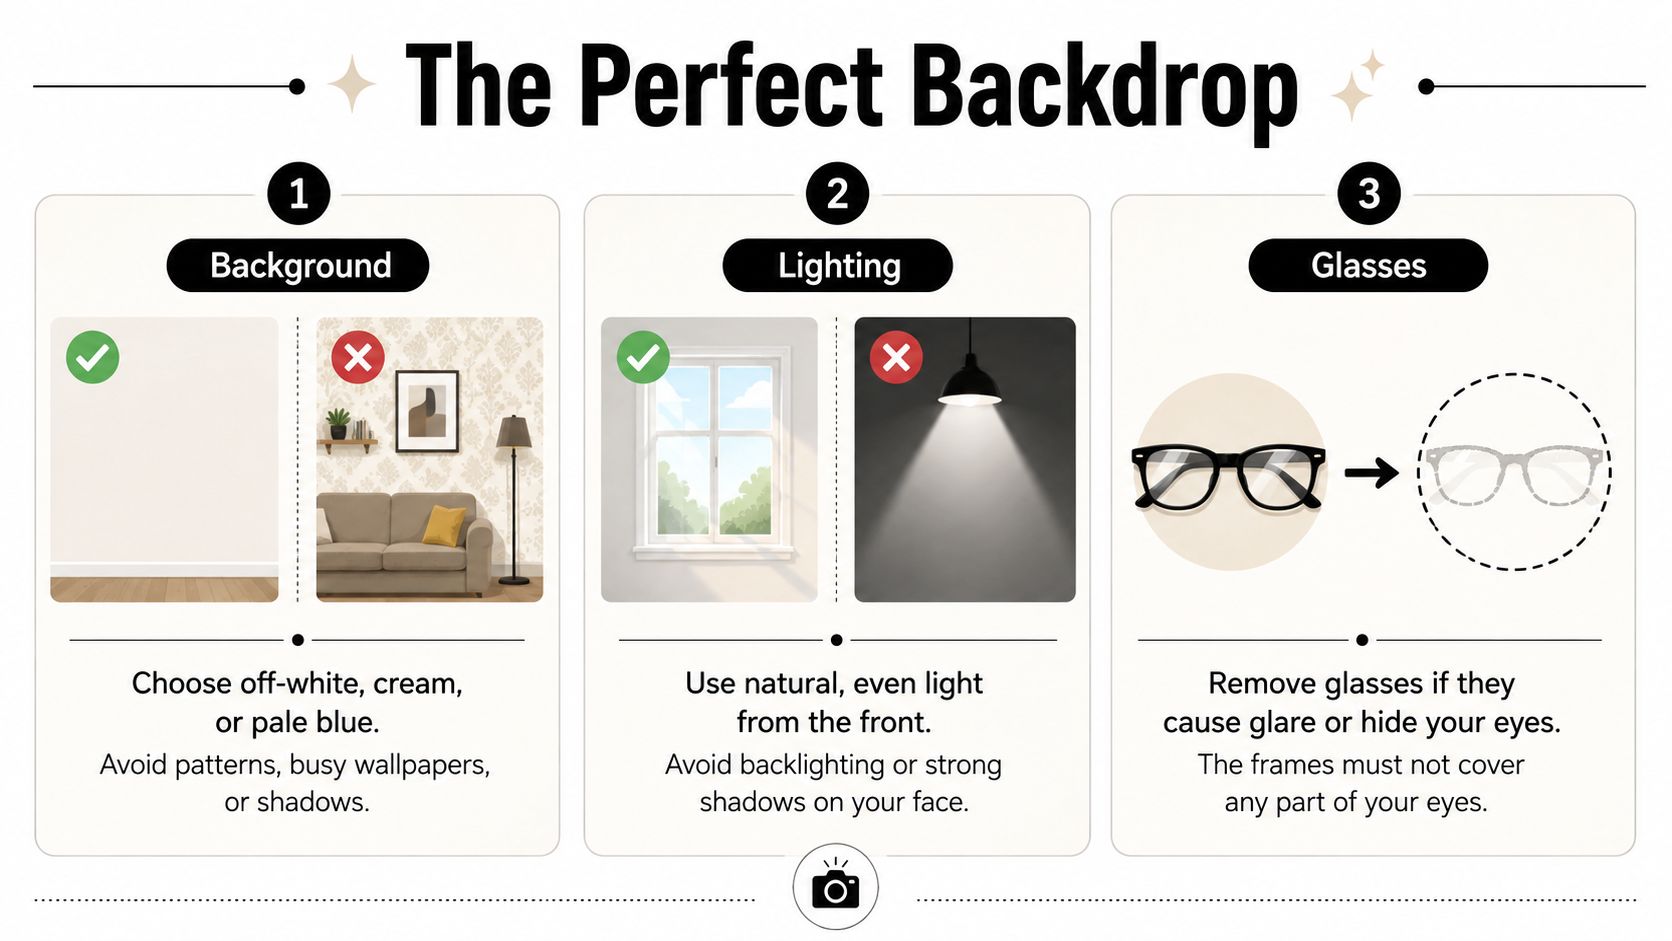
A compliant setup doesn’t need to look like a studio. It needs to remove visual distractions and show your face evenly. Start with a plain, light-coloured wall or a smooth background such as off-white, cream, or pale blue. A patterned wall, busy wallpaper, visible furniture, or a corner with strong contrast creates uncertainty about the outline of your head.
Stand far enough from the background that your head doesn’t cast a dark shape behind you. A wall can be the correct colour and still cause a rejection if the lighting produces a visible shadow.
Build even light at home
Place yourself facing a window with soft daylight, rather than standing with the window behind your head. If the light is strong on one side of your face, move closer to the centre of the room or use another soft light source from the opposite side. Avoid harsh overhead lamps, direct flash, and bright light aimed at the wall.
Review the test image at full size. Look for:
- Face shadows: Both sides of the face should be visible without dark patches under the eyes, nose, or chin.
- Background shadows: The area behind your head should remain plain and evenly lit.
- Glare: Skin, jewellery, and lenses shouldn’t reflect a bright flash or lamp.
- Red-eye and focus: The eyes must look natural, and the image must be sharp rather than blurred or grainy.
Make a cautious decision about glasses
The official guidance requires the eyes to be clearly visible and says glasses must not create glare or reflections. In practical terms, removing glasses is the lowest-risk choice for a standard application. Sunglasses and tinted lenses obscure the eyes, while thick frames may cover facial features even when the lenses appear transparent.
If you can’t remove glasses for a medical reason, you need to follow the current official instructions carefully and make sure the eyes remain fully visible, with no reflection or frame obstruction. Don’t assume that clear lenses automatically pass. The photograph is assessed as a whole, and a tiny reflection across one eye can make the face harder to verify.
Expression, Framing, and What a True Likeness Really Means
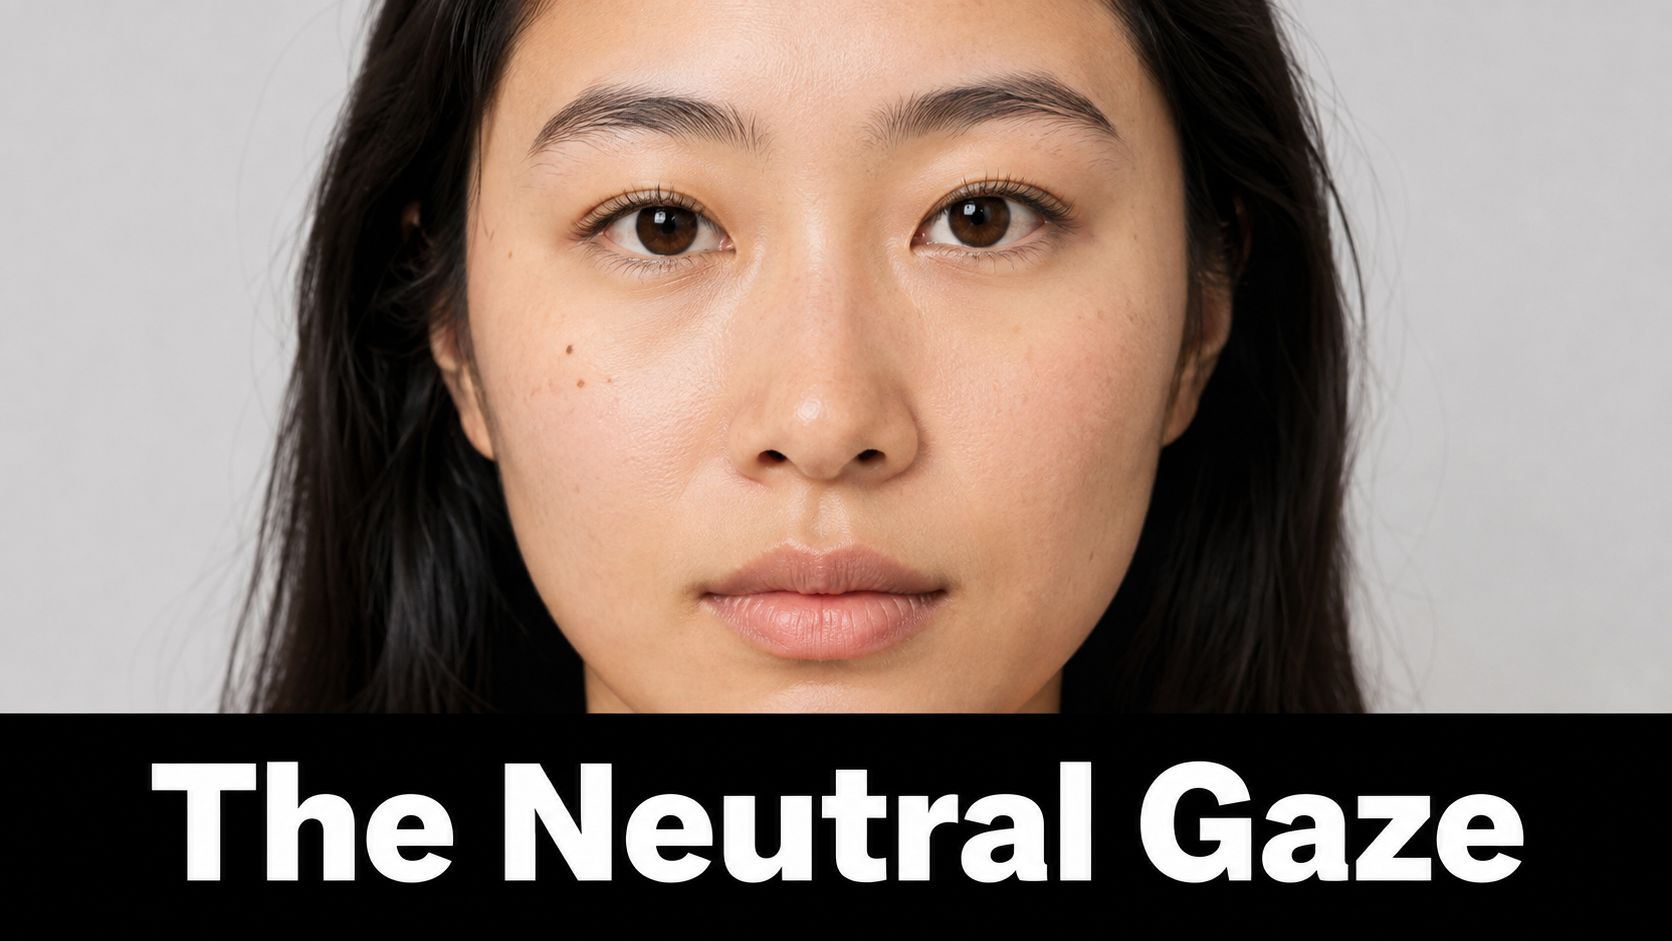
A passport photograph isn’t meant to show your personality. It must show your face in a stable, recognisable way. Face the camera directly, keep your eyes open and clearly visible, and close your mouth. A broad smile, frown, raised eyebrows, or squint can change the features an examiner needs to compare.
Use the camera as a positioning guide
Ask another person to take the photograph if possible. Place the camera at eye level, keep your head straight, and centre your face in the frame. Your head and upper shoulders should be visible, with enough space around the sides and above the head. A crop that cuts into the hair or chin is risky, but so is excessive empty space that makes the face too small.
Take several captures without changing the setup. Compare them at full size, checking whether your eyes are level and whether your face is centred rather than angled toward the phone.
Look for recognition, not glamour. The strongest passport image is usually the least stylised one.
Understand the true-likeness test
GOV.UK says the image must be a true likeness of the holder. That requirement rules out more than obvious cartoon effects. Heavy filters, AI-assisted facial changes, skin-smoothing tools, reshaped features, and artificial lighting that changes your natural appearance can all create a mismatch between the photograph and your face.
An old photograph can also be unsuitable even if it still resembles you. The current recency requirement exists so the document reflects how you look now. Choose ordinary clothing and a natural appearance, then check whether someone who knows you would recognise the image immediately without relying on the background or styling.
Rules for Babies and Children That Trip Up Parents
A parent photographing a toddler often gets one usable frame after many attempts. The child turns away, opens their mouth, or looks at the person holding the phone instead of the lens. That doesn’t mean a professional studio is the only answer, but it does mean the adult needs a calm, controlled setup.
The general rules still apply to children. Use a plain, light-coloured background, even lighting, a clear colour image, and a recent photograph. Very young children may have limited flexibility around expression and head position, especially under one, but parents shouldn’t treat those relaxations as permission to ignore the core identity requirements.
Make the room do the work
For a baby, place a plain blanket on the floor and photograph from above, keeping the blanket smooth and free from folds that could create distracting shadows. Don’t leave a hand, toy, bottle, or adult’s body in the frame. A parent can squat behind the photographer to attract the child’s attention, but the photograph should show only the child.
Newborns can’t be photographed until they meet the applicable passport-photo conditions. Infants may be accepted with their eyes not fully open in limited circumstances, and supporting hands can be tolerated for very young babies where necessary, but the child should still face the camera as directly as possible.
A baby passport photo guide can help parents think through positioning and the practical differences between an infant and an older child. For a toddler, take the picture when the child is settled, keep the camera at eye level, and use a familiar person behind the phone to encourage a direct gaze.
Don’t force a smile or repeatedly reposition a distressed child. Pause, reset the background and lighting, and try again when the child is calm. The best image may be the simplest one, with a relaxed face, open eyes, and no distracting objects.
Where to Get UK Passport Photos That Actually Pass
The right option depends on how much control you want over the setup and how much uncertainty you’re comfortable managing. A careful home capture may work well for an online application, while a parent with a restless child may prefer an in-person service that can retake the image immediately.
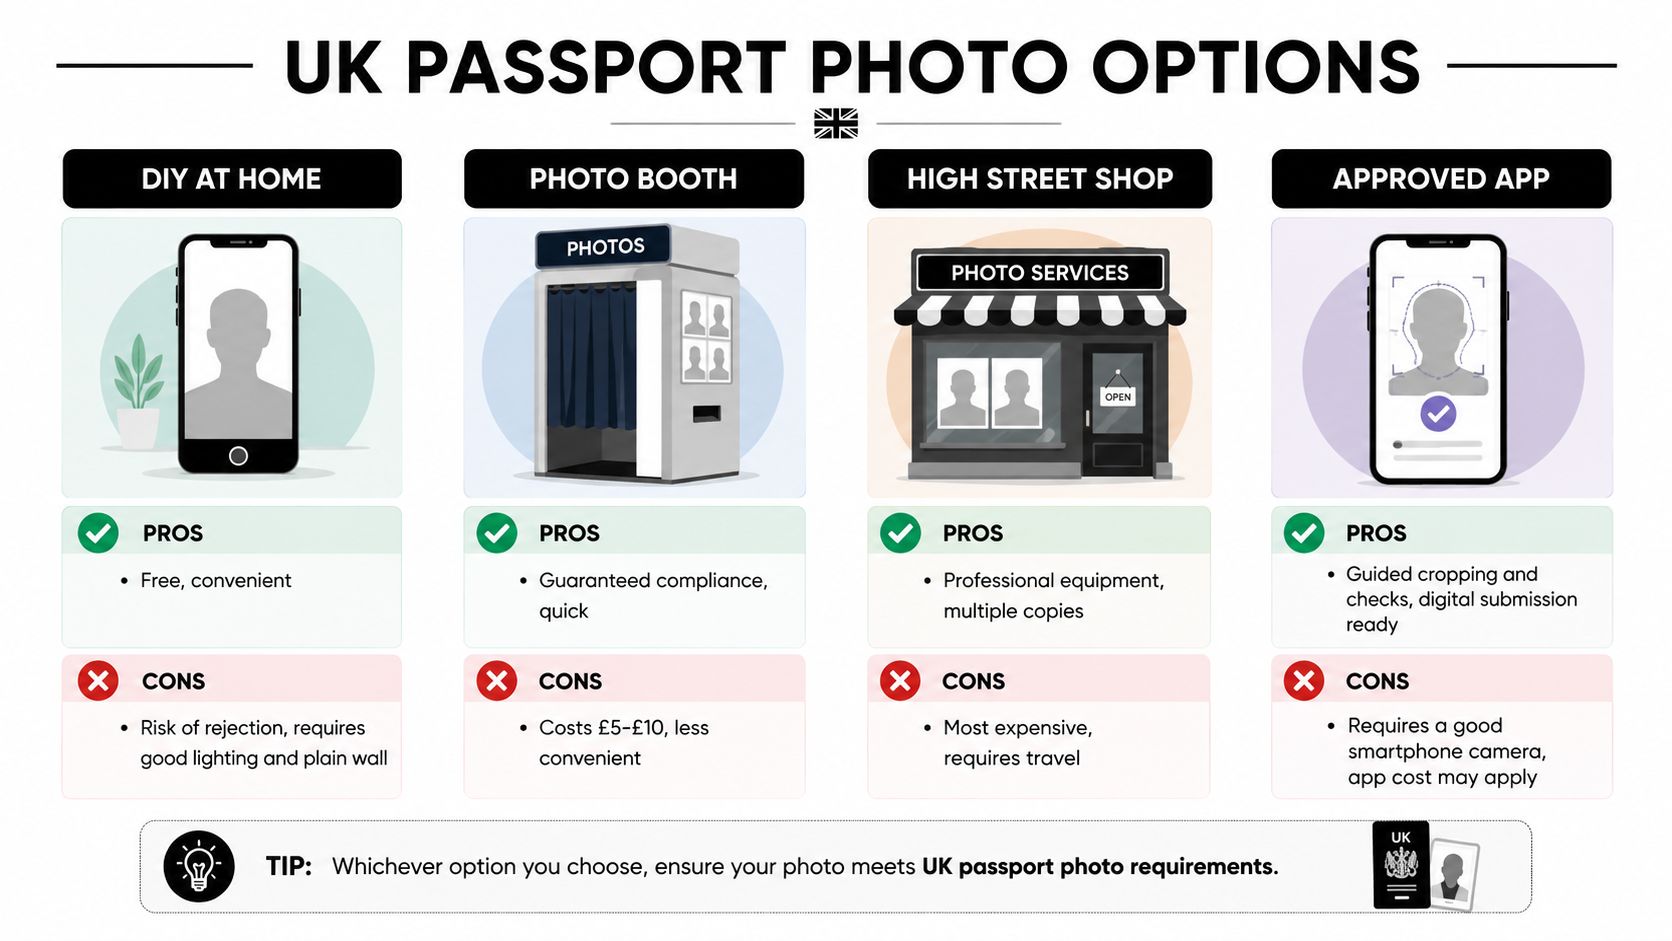
Compare the practical choices
| Option | Cost profile | Speed | Retakes | Rejection risk |
|---|---|---|---|---|
| DIY smartphone capture | Lowest if you already have the equipment | Immediate | Easy to repeat | Depends heavily on setup and checking |
| Passport photo app | App cost may apply | Fast digital preparation | Usually easy before export | Reduced only if you still follow official rules |
| Photo booth | Paid service | Quick | Limited by the booth process | Lower when the booth provides compliance guidance |
| Pharmacy or supermarket kiosk | Printing cost plus preparation | Convenient if available locally | May require another visit | Depends on the original capture and crop |
| In-store photo service | Usually higher than DIY | Appointment or walk-in dependent | Staff may retake the image | Lower when staff check lighting and composition |
A smartphone gives you control over timing, especially with children, but it also leaves you responsible for the wall, camera angle, expression, crop, and file validation. An approved app can guide cropping and prepare a digital file, yet it can’t repair a shadowed face or turn an edited image into an unedited one.
A booth is fast and repeatable, though the fixed setup may not suit every child or person with mobility needs. A pharmacy or supermarket kiosk can be convenient for prints, but check whether it creates the required final size rather than printing an ordinary image.
When in-person help is worth considering
An in-store passport photo service may suit applicants who want someone else to manage the camera distance, lighting, and print preparation. Business Mail Boutique LLC offers passport and ID photos at its Sugar Land location, alongside editing and delivery in the requested format. For general portrait preparation, this corporate portrait photography guide also illustrates why controlled lighting and careful positioning matter, although passport rules remain the deciding standard.
Compare opening hours, whether digital files are supplied, whether printed copies are available, and whether the operator will retake a photo that fails its own review. You can also use this guide to find international passport photos near you when your requirements differ from the UK standard.
Pre-Submission Checklist and the Most Common Rejection Reasons
Run the final image through three separate audits. Don’t judge it only by asking whether you look presentable. Ask whether every visible feature supports fast and reliable identification.
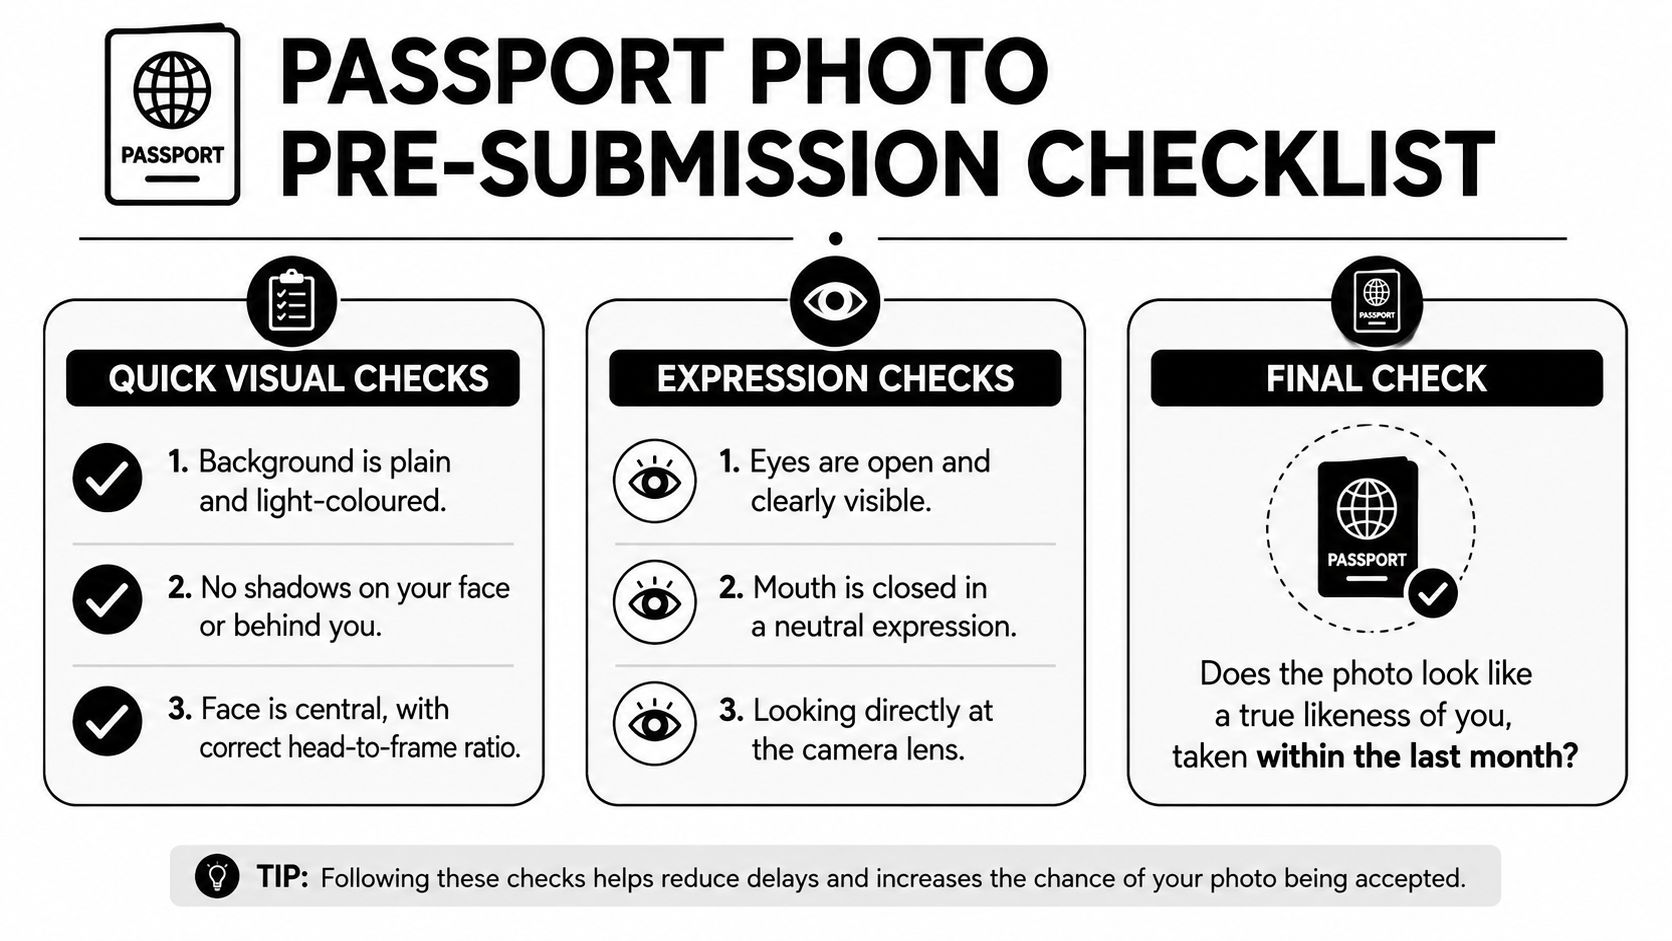
Visual checks
- Background: Is it plain and light-coloured, without furniture, patterns, or visible shadows?
- Lighting: Is your face evenly lit, with no red-eye, flash glare, or dark areas?
- Framing: Is your head centred, fully visible, and surrounded by a suitable amount of space?
Expression checks
- Eyes: Are both eyes open and clearly visible?
- Mouth: Is it closed, with a neutral expression rather than a smile or frown?
- Direction: Are you looking directly toward the camera with your head facing forward?
Final file checks
- Recency: Was the photo taken within the last month?
- Digital quality: Is the colour image clear, unedited, at least 600 pixels wide by 750 pixels tall, and between 50 KB and 10 MB, as required by GOV.UK’s digital photo guidance?
- Paper preparation: Are there two identical prints in the required passport-photo format?
The mistakes worth prioritising are wrong dimensions, shadows behind the head, closed or obscured eyes, reflections on glasses, blur, and filters that alter your appearance. If any answer is uncertain, take a new photograph before you upload or print it.
What to Do Next With Your Compliant Photo
Choose the submission route first, then prepare the final version for that route. For a paper application, check that both prints are identical and cleanly produced. Attach them to the form as instructed, avoiding folds, creases, staples, or anything else that could damage the image or cover part of it.
For an online application, upload the final digital file through GOV.UK rather than sending a screenshot or a compressed copy from a messaging app. Open the file on the device you’ll use for upload and check its orientation, colour, sharpness, dimensions, and file size. A photo that rotates correctly in your gallery may still export sideways, so inspect the actual file before submitting it.
The current GOV.UK requirements are the source that matters if advice elsewhere conflicts with your memory or an older template. This guide translates those rules into practical checks, but it isn’t a legal document or a replacement for official instructions.
Final decision: When a photo is borderline, retake it. A fresh capture costs less time than correcting an avoidable rejection, especially when travel plans depend on the application.
Once the image passes the visual and technical checks, submit the paper form with its matching prints or upload the digital file. Keep the accepted original and the final printed version together until the application is complete.
Business Mail Boutique LLC offers passport and ID photo services, photo printing, and practical document support from its Sugar Land storefront. Visit Business Mail Boutique LLC if you want help preparing a UK passport photo for digital submission or printed use.

Related posts

Custom Memorial Glasses Engraved in Three Hours in Sugar Land
When a customer needed eight personalized glasses for a memorial, Business Mail Boutique completed the engraving or...

Custom Martini Glass Engraving in Sugar Land, TX
Custom Logo Engraving on Martini Glasses in Sugar Land, Texas.
Business Mail Boutique recently completed a beautiful custom engravin...

Custom Engraved Wine Glasses for a Golf Club Event in Sugar Land, TX
Custom Engraved Wine Glasses for a Golf Club Event in Sugar Land.
Custom wine glass engraving in Sugar Land, TX at Business Mail Bouti...